이번시간에는 안드로이드 자바로 HttpUrlConnection을 사용해 통신하는 예제를 만들어보겠습니다.
저번에는 HttpUrlConnection을 이용하여 서버와의 통신을 진행해보았는데요.
이번에는 OKHttp라이브러리를 사용하여 서버와 통신하고, 이를 통해
로그인과 회원가입을 구현해 보겠습니다.
스틱코드 (stickode.com/mainlogin.html)
이번에도 역시 빠르게 만들기 위해 스틱코드 플러그인을 사용해서 만들어보겠습니다.
스틱코드는 자주쓰는 코드를 저장해서 쉽고 빠르게 사용할 수 있고,
다른사람들의 코드도 즐겨찾기를 통해 쉽게 내코드로 등록하여 사용할 수 있어 사용하는 사람이 늘어나고,
좋은 코드가 쌓일수록 강력해지는 플러그인 입니다.
프로젝트 생성

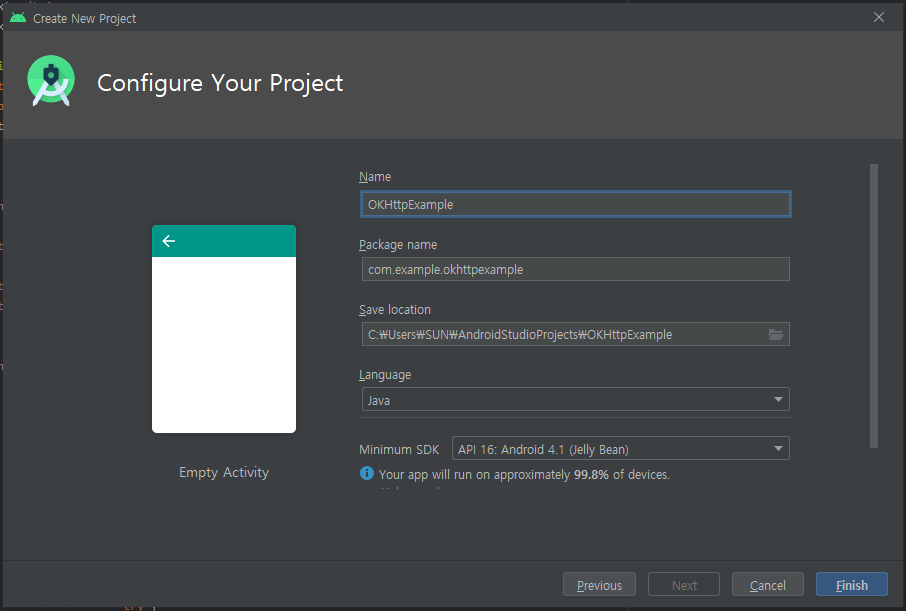
새로운 프로젝트를 생성 했고,
권한설정
이번시간엔 통신을 이용하기 때문에
AndroidManifest.xml 파일 안에 Internet 권한을 추가해주어야 합니다.

<!-- 인터넷 권한 설정   -->
<uses-permission android:name="android.permission.INTERNET" />
<!-- 인터넷 연결 확인-->
<uses-permission android:name="android.permission.ACCESS_NETWORK_STATE"/>
XML 파일 설정
로그인 XML
<?xml version="1.0" encoding="utf-8"?>
<androidx.constraintlayout.widget.ConstraintLayout xmlns:android="http://schemas.android.com/apk/res/android"
    xmlns:app="http://schemas.android.com/apk/res-auto"
    xmlns:tools="http://schemas.android.com/tools"
    android:layout_width="match_parent"
    android:layout_height="match_parent"
    tools:context=".MainActivity">

    <TextView
        android:id="@+id/textView"
        android:layout_width="wrap_content"
        android:layout_height="wrap_content"
        android:layout_marginTop="40dp"
        android:text="로그인"
        android:textSize="40sp"
        android:textStyle="bold"
        app:layout_constraintEnd_toEndOf="parent"
        app:layout_constraintStart_toStartOf="parent"
        app:layout_constraintTop_toTopOf="parent" />

    <Button
        android:id="@+id/singInBtn"
        android:layout_width="match_parent"
        android:layout_height="wrap_content"
        android:layout_marginStart="50dp"
        android:layout_marginLeft="50dp"
        android:layout_marginTop="8dp"
        android:layout_marginEnd="50dp"
        android:layout_marginRight="50dp"
        android:text="로그인"
        app:layout_constraintEnd_toEndOf="parent"
        app:layout_constraintHorizontal_bias="0.0"
        app:layout_constraintStart_toStartOf="parent"
        app:layout_constraintTop_toBottomOf="@+id/input_pwd" />

    <EditText
        android:id="@+id/input_pwd"
        android:layout_width="match_parent"
        android:layout_height="wrap_content"
        android:layout_marginStart="50dp"
        android:layout_marginLeft="50dp"
        android:layout_marginEnd="50dp"
        android:layout_marginRight="50dp"
        android:layout_marginBottom="8dp"
        android:ems="10"
        android:hint="비밀번호를 입력해주세요."
        android:inputType="textPassword"
        app:layout_constraintBottom_toTopOf="@+id/singInBtn"
        app:layout_constraintEnd_toEndOf="parent"
        app:layout_constraintStart_toStartOf="parent" />

    <EditText
        android:id="@+id/input_id"
        android:layout_width="match_parent"
        android:layout_height="wrap_content"
        android:layout_marginStart="50dp"
        android:layout_marginLeft="50dp"
        android:layout_marginTop="32dp"
        android:layout_marginEnd="50dp"
        android:layout_marginRight="50dp"
        android:layout_marginBottom="8dp"
        android:ems="10"
        android:hint="아이디를 입력해주세요."
        android:inputType="textPersonName"
        app:layout_constraintBottom_toTopOf="@+id/input_pwd"
        app:layout_constraintEnd_toEndOf="parent"
        app:layout_constraintStart_toStartOf="parent"
        app:layout_constraintTop_toBottomOf="@+id/textView" />

    <TextView
        android:id="@+id/signup_text"
        android:layout_width="wrap_content"
        android:layout_height="wrap_content"
        android:layout_marginTop="24dp"
        android:text="회원가입"
        android:textSize="15sp"
        app:layout_constraintEnd_toEndOf="parent"
        app:layout_constraintStart_toStartOf="parent"
        app:layout_constraintTop_toBottomOf="@+id/singInBtn" />

</androidx.constraintlayout.widget.ConstraintLayout>
회원가입 XML
<?xml version="1.0" encoding="utf-8"?>
<androidx.constraintlayout.widget.ConstraintLayout xmlns:android="http://schemas.android.com/apk/res/android"
    xmlns:app="http://schemas.android.com/apk/res-auto"
    xmlns:tools="http://schemas.android.com/tools"
    android:layout_width="match_parent"
    android:layout_height="match_parent"
    tools:context=".SignUp">

    <TextView
        android:id="@+id/textView"
        android:layout_width="wrap_content"
        android:layout_height="wrap_content"
        android:layout_marginTop="40dp"
        android:text="회원가입"
        android:textSize="40sp"
        android:textStyle="bold"
        app:layout_constraintEnd_toEndOf="parent"
        app:layout_constraintStart_toStartOf="parent"
        app:layout_constraintTop_toTopOf="parent" />


    <EditText
        android:id="@+id/input_pwd"
        android:layout_width="match_parent"
        android:layout_height="wrap_content"
        android:layout_marginStart="50dp"
        android:layout_marginLeft="50dp"
        android:layout_marginTop="8dp"
        android:layout_marginEnd="50dp"
        android:layout_marginRight="50dp"
        android:ems="10"
        android:hint="비밀번호를 입력해주세요."
        android:inputType="textPassword"
        app:layout_constraintEnd_toEndOf="parent"
        app:layout_constraintStart_toStartOf="parent"
        app:layout_constraintTop_toBottomOf="@+id/input_id" />

    <EditText
        android:id="@+id/input_id"
        android:layout_width="match_parent"
        android:layout_height="wrap_content"
        android:layout_marginStart="50dp"
        android:layout_marginLeft="50dp"
        android:layout_marginTop="32dp"
        android:layout_marginEnd="50dp"
        android:layout_marginRight="50dp"
        android:ems="10"
        android:hint="아이디를 입력해주세요."
        android:inputType="textPersonName"
        app:layout_constraintEnd_toEndOf="parent"
        app:layout_constraintStart_toStartOf="parent"
        app:layout_constraintTop_toBottomOf="@+id/textView" />


    <EditText
        android:id="@+id/input_nick"
        android:layout_width="match_parent"
        android:layout_height="wrap_content"
        android:layout_marginStart="50dp"
        android:layout_marginLeft="50dp"
        android:layout_marginTop="8dp"
        android:layout_marginEnd="50dp"
        android:layout_marginRight="50dp"
        android:ems="10"
        android:hint="닉네임을 입력해주세요."
        android:inputType="textPersonName"
        app:layout_constraintEnd_toEndOf="parent"
        app:layout_constraintStart_toStartOf="parent"
        app:layout_constraintTop_toBottomOf="@+id/input_pwd" />


    <Button
        android:id="@+id/singUpBtn"
        android:layout_width="match_parent"
        android:layout_height="wrap_content"
        android:layout_marginStart="50dp"
        android:layout_marginLeft="50dp"
        android:layout_marginTop="8dp"
        android:layout_marginEnd="50dp"
        android:layout_marginRight="50dp"
        android:text="회원가입"
        app:layout_constraintEnd_toEndOf="parent"
        app:layout_constraintHorizontal_bias="1.0"
        app:layout_constraintStart_toStartOf="parent"
        app:layout_constraintTop_toBottomOf="@+id/input_nick" />


</androidx.constraintlayout.widget.ConstraintLayout>

다음과 같은 화면이 만들어졌네요.
먼저 회원가입부터 진행을 해야하니 로그인 창에서 회원가입 버튼을 누르면 이동 할 수 있게 해보겠습니다.
인텐트를 함수화 시켜 스틱코드에 저장해두었는데요.
단숨에 함수를 셋팅해보겠습니다.

다음과같이 스틱코드를 사용하면

간단히 완성되었습니다.
이제 회원가입 버튼을 누르면 이동하게 해보겠습니다.
@Override
protected void onCreate(Bundle savedInstanceState) {
    super.onCreate(savedInstanceState);
    setContentView(R.layout.activity_main);

    // UI 요소 연결
    singInBtn = findViewById(R.id.singInBtn);
    input_id = findViewById(R.id.input_id);
    input_pwd = findViewById(R.id.input_pwd);
    signup_text = findViewById(R.id.signup_text);

    signup_text.setOnClickListener(new View.OnClickListener() {
        @Override
        public void onClick(View v) {
            startActivityC(SignUp.class);
        }
    });
}
아이디와 비밀번호를 작성하고, 회원가입 버튼을 누르면
OKHttp3 라이브러리를 사용해 서버로 요청을 보내 제 개인 db에 저장해보도록 하겠습니다.
저는 개인적으로 사용하는 서버로 테스트를 진행하였습니다.
로컬에 서버를 구축하시거나, aws를 빌려 서버를 구축해서 테스트해보시기 바랍니다.
아파치 서버에서 PHP 언어를 사용하여 요청값을 Mysql에 저장해 회원가입을 시켜보겠습니다.
OKHttp3 라이브러리 통신
라이브러리를 사용하기 위해서는 gradle(:app) 파일의 dependencies에 해당 라이브러리를 추가하고
싱크를 맞춰 주어야 합니다.


이번에도 스틱코드를 활용하여 통신 셋팅을 해보도록 하겠습니다.
출처 : stickode.com/detail.html?no=1306

// 회원가입 버튼 클릭
singUpBtn.setOnClickListener(new View.OnClickListener() {
    @Override
    public void onClick(View v) {

        // get방식 파라미터 추가
        HttpUrl.Builder urlBuilder = HttpUrl.parse("your_server_url").newBuilder();
                urlBuilder.addQueryParameter("v", "1.0"); // 예시
                String url = urlBuilder.build().toString();

                // POST 파라미터 추가
                RequestBody formBody = new FormBody.Builder()
                .add("username", "test")
                .add("password", "test")
                .build();

                // 요청 만들기
                OkHttpClient client = new OkHttpClient();
                Request request = new Request.Builder()
                .url(url)
                .post(formBody)
                .build();

        // 응답 콜백
        client.newCall(request).enqueue(new Callback() {
            @Override
            public void onFailure(Call call, IOException e) {
                e.printStackTrace();
            }

            @Override
            public void onResponse(Call call, final Response response) throws IOException {
                if (!response.isSuccessful()) {
                    // 응답 실패
                    Log.i("tag", "응답실패");
                } else {
                    // 응답 성공
                    Log.i("tag", "응답 성공");
                    final String responseData = response.body().string();
                    // 서브 스레드 Ui 변경 할 경우 에러
                    // 메인스레드 Ui 설정
                    runOnUiThread(new Runnable() {
                        @Override
                        public void run() {
                            try {
                                Toast.makeText(getApplicationContext(), "응답" + responseData, Toast.LENGTH_SHORT).show();
                            } catch (Exception e) {
                                e.printStackTrace();
                            }
                        }
                    });
                }
            }
        });
    }
});
통신에서 파라미터 값을 EditText의 파라미터 값으로 넣어줄 수 있게 셋팅하고
EditText값의 예외처리도 진행해주었습니다.

인터넷이 연결 되었을 때만 실행 될수 있게 예외처리를 추가해보겠습니다.
통신은 자주 쓰기 때문에 인터넷 체크도 스틱코드에 등록해두면 손쉽게 코드작성을 할 수 있습니다.
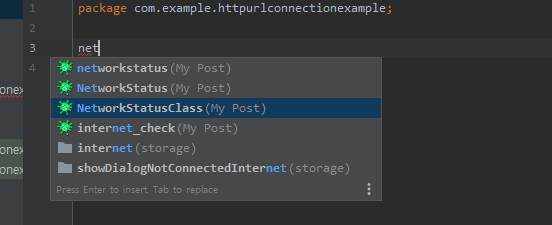
먼저 인터넷을 체크할 수 있는 클래스 파일을 만들어주겠습니다.


이렇게 생긴 클래스 파일에서 스틱코드를 사용해 클래스 파일을 셋팅해보겠습니다.
출처 : stickode.com/detail.html?no=1923

package com.example.httpurlconnectionexample;
import android.content.Context;
import android.net.ConnectivityManager;
import android.net.NetworkInfo;

public class NetworkStatus {
    public static final int TYPE_WIFI = 1;
    public static final int TYPE_MOBILE = 2;
    public static final int TYPE_NOT_CONNECTED = 3;

    public static int getConnectivityStatus(Context context){ //해당 context의 서비스를 사용하기위해서 context객체를 받는다.
        ConnectivityManager manager = (ConnectivityManager) context.getSystemService(context.CONNECTIVITY_SERVICE);

        NetworkInfo networkInfo = manager.getActiveNetworkInfo();
        if(networkInfo != null){
            int type = networkInfo.getType();
            if(type == ConnectivityManager.TYPE_MOBILE){//쓰리지나 LTE로 연결된것(모바일을 뜻한다.)
                return TYPE_MOBILE;
            }else if(type == ConnectivityManager.TYPE_WIFI){//와이파이 연결된것
                return TYPE_WIFI;
            }
        }
        return TYPE_NOT_CONNECTED;  //연결이 되지않은 상태
    }
}
그럼 다음과 같이 코드가 단번에 완성됩니다.
출처 : stickode.com/detail.html?no=1923
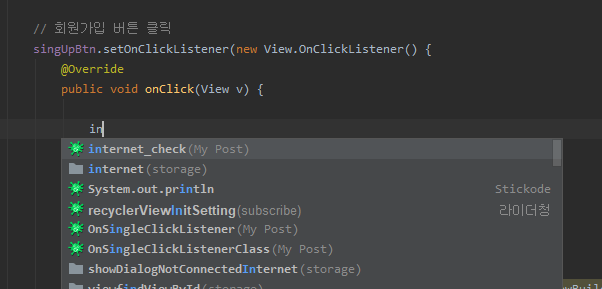
이제 인터넷 연결을 체크할 곳에 코드를 추가해보겠습니다.
마찬가지로 스틱코드로 셋팅을 해보겠습니다.

int status = NetworkStatus.getConnectivityStatus(getApplicationContext());
if(status == NetworkStatus.TYPE_MOBILE || status == NetworkStatus.TYPE_WIFI) {

}else {
Toast.makeText(getApplicationContext(), "인터넷 연결을 확인해주세요.", Toast.LENGTH_SHORT).show();
}
이렇게 만들어진 예외처리 안에 통신을 넣으면
인터넷 연결 예외처리가 완료되었습니다.
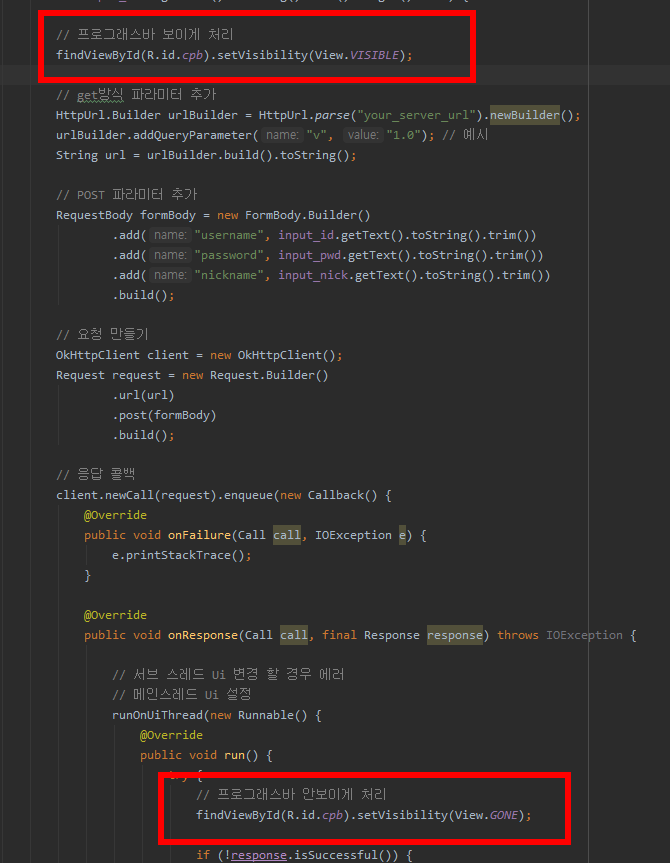
자그럼 이번에는 통신이 시작하면 프로그레스바를 보이게 처리하고,
통신이 끝나면 프로그레스바를 없애는 코드까지 추가해서 셋팅을 완성 해보겠습니다.

이렇게 추가해서 통신할 셋팅이 완성되었습니다.
아래 코드는 SignUp.class전문입니다.
package com.example.okhttpexample;
import okhttp3.Call;
import okhttp3.Callback;
import okhttp3.FormBody;
import okhttp3.HttpUrl;
import okhttp3.OkHttpClient;
import okhttp3.Request;
import okhttp3.RequestBody;
import okhttp3.Response;

import androidx.appcompat.app.AppCompatActivity;

import android.content.Intent;
import android.os.Bundle;
import android.util.Log;
import android.view.View;
import android.widget.Button;
import android.widget.EditText;
import android.widget.TextView;
import android.widget.Toast;

import java.io.IOException;

public class SignUp extends AppCompatActivity {

    // 변수 초기설정
    Button singUpBtn;
    EditText input_id;
    EditText input_pwd;
    EditText input_nick;
    TextView signup_text;

    @Override
    protected void onCreate(Bundle savedInstanceState) {
        super.onCreate(savedInstanceState);
        setContentView(R.layout.activity_sign_up);


        // UI 요소 연결
        singUpBtn = findViewById(R.id.singUpBtn);
        input_id = findViewById(R.id.input_id);
        input_pwd = findViewById(R.id.input_pwd);
        input_nick = findViewById(R.id.input_nick);

        // 회원가입 버튼 클릭
        singUpBtn.setOnClickListener(new View.OnClickListener() {
            @Override
            public void onClick(View v) {

                int status = NetworkStatus.getConnectivityStatus(getApplicationContext());
                if(status == NetworkStatus.TYPE_MOBILE || status == NetworkStatus.TYPE_WIFI) {

                    // EditText값 예외처리
                    if(input_id.getText().toString().trim().length() > 0 ||
                        input_pwd.getText().toString().trim().length() > 0 ||
                        input_nick.getText().toString().trim().length() > 0 ) {

                        // 프로그래스바 보이게 처리
                        findViewById(R.id.cpb).setVisibility(View.VISIBLE);

                        // get방식 파라미터 추가
                        HttpUrl.Builder urlBuilder = HttpUrl.parse("your server url").newBuilder();
                        urlBuilder.addQueryParameter("v", "1.0"); // 예시
                        String url = urlBuilder.build().toString();

                        // POST 파라미터 추가
                        RequestBody formBody = new FormBody.Builder()
                                .add("id", input_id.getText().toString().trim())
                                .add("pw", input_pwd.getText().toString().trim())
                                .add("nickname", input_nick.getText().toString().trim())
                                .build();

                        // 요청 만들기
                        OkHttpClient client = new OkHttpClient();
                        Request request = new Request.Builder()
                                .url(url)
                                .post(formBody)
                                .build();

                        // 응답 콜백
                        client.newCall(request).enqueue(new Callback() {
                            @Override
                            public void onFailure(Call call, IOException e) {
                                e.printStackTrace();
                            }

                            @Override
                            public void onResponse(Call call, final Response response) throws IOException {

                                // 서브 스레드 Ui 변경 할 경우 에러
                                // 메인스레드 Ui 설정
                                runOnUiThread(new Runnable() {
                                    @Override
                                    public void run() {
                                        try {
                                            // 프로그래스바 안보이게 처리
                                            findViewById(R.id.cpb).setVisibility(View.GONE);

                                            if (!response.isSuccessful()) {
                                                // 응답 실패
                                                Log.i("tag", "응답실패");
                                                Toast.makeText(getApplicationContext(), "네트워크 문제 발생", Toast.LENGTH_SHORT).show();

                                            } else {
                                                // 응답 성공
                                                Log.i("tag", "응답 성공");
                                                final String responseData = response.body().string();
                                                if(responseData.equals("0")) {
                                                    startActivityflag(MainActivity.class);
                                                }else {
                                                    Toast.makeText(getApplicationContext(), "회원가입에 실패 했습니다." + responseData, Toast.LENGTH_SHORT).show();
                                                }
                                            }

                                        } catch (Exception e) {
                                            e.printStackTrace();
                                        }
                                    }
                                });

                            }
                        });
                    }

                }else {
                  Toast.makeText(getApplicationContext(), "인터넷 연결을 확인해주세요.", Toast.LENGTH_SHORT).show();
                }

            }
        });

    }

    // 액티비티 전환 함수

    // 인텐트 액티비티 전환함수
    public void startActivityC(Class c) {
        Intent intent = new Intent(getApplicationContext(), c);
        startActivity(intent);
        // 화면전환 애니메이션 없애기
        overridePendingTransition(0, 0);
    }
    // 인텐트 화면전환 하는 함수
    // FLAG_ACTIVITY_CLEAR_TOP = 불러올 액티비티 위에 쌓인 액티비티 지운다.
    public void startActivityflag(Class c) {
        Intent intent = new Intent(getApplicationContext(), c);
        intent.addFlags(Intent.FLAG_ACTIVITY_CLEAR_TOP);
        startActivity(intent);
        // 화면전환 애니메이션 없애기
        overridePendingTransition(0, 0);
    }

    // 문자열 인텐트 전달 함수
    public void startActivityString(Class c, String name , String sendString) {
        Intent intent = new Intent(getApplicationContext(), c);
        intent.putExtra(name, sendString);
        startActivity(intent);
        // 화면전환 애니메이션 없애기
        overridePendingTransition(0, 0);
    }

    // 백스택 지우고 새로 만들어 전달
    public void startActivityNewTask(Class c){
        Intent intent = new Intent(getApplicationContext(), c);
        intent.addFlags(Intent.FLAG_ACTIVITY_CLEAR_TASK | Intent.FLAG_ACTIVITY_NEW_TASK);
        startActivity(intent);
        // 화면전환 애니메이션 없애기
        overridePendingTransition(0, 0);
    }
}
이제 미리 작성해둔 회원가입하는 로직입니다.
아래 파일로 요청을 해서 회원가입이 완료되면 로그인 페이지로 넘어가보도록 하겠습니다.
<?php
    include "dbcon.php";

    $result=mysqli_query($db, "INSERT INTO user(id, pw, nickname) VALUES ('$_POST[id]','$_POST[pw]','$_POST[nickname]')");
    mysqli_close($db);

    if($result){
        // 성공
        echo 1;
    }else {
        // 실패
        echo 0;
    }


?>
자 이제 마지막으로 로그인 페이지에서 로그인을 해보도록하겠습니다.
<?php
    include "dbcon.php";

    //넘어온 폼 데이터 id, pw
    $id = $_POST['id'];
    $pw = $_POST['pw'];

    $sql = "SELECT * FROM user WHERE id='$id' AND (pw='$pw')";
    // echo  $sql;
    $result = mysqli_query($db, $sql);
    $member = mysqli_fetch_array($result);
    print_r($member);
    // 아이디와 비밀번호가 일치하지 않으면 실패
	if($member==0){
        echo 1;
    // 일치하면 성공
    }else{
        echo $member['nickname'];
        exit();
    }
?>
php에서 로그인을 완료하면 닉네임을 메인액티비티에 넘겨줘 띄워 주겠습니다.
아래 코드는 LoginActivity.class전문입니다.
package com.example.okhttpexample;

import androidx.appcompat.app.AppCompatActivity;

import android.content.Intent;
import android.graphics.Rect;
import android.os.Bundle;
import android.util.Log;
import android.view.MotionEvent;
import android.view.View;
import android.view.inputmethod.InputMethodManager;
import android.widget.Button;
import android.widget.EditText;
import android.widget.TextView;
import android.widget.Toast;

import java.io.IOException;

import okhttp3.Call;
import okhttp3.Callback;
import okhttp3.FormBody;
import okhttp3.HttpUrl;
import okhttp3.OkHttpClient;
import okhttp3.Request;
import okhttp3.RequestBody;
import okhttp3.Response;

public class LoginActivity extends AppCompatActivity {

    // 변수 초기설정
    Button singInBtn;
    EditText input_id;
    EditText input_pwd;
    TextView signup_text;


    @Override
    protected void onCreate(Bundle savedInstanceState) {
        super.onCreate(savedInstanceState);
        setContentView(R.layout.activity_login);

        // UI 요소 연결
        singInBtn = findViewById(R.id.singInBtn);
        input_id = findViewById(R.id.input_id);
        input_pwd = findViewById(R.id.input_pwd);
        signup_text = findViewById(R.id.signup_text);

        signup_text.setOnClickListener(new View.OnClickListener() {
            @Override
            public void onClick(View v) {
                startActivityC(SignUp.class);
            }
        });

        singInBtn.setOnClickListener(new View.OnClickListener() {
            @Override
            public void onClick(View v) {
                int status = NetworkStatus.getConnectivityStatus(getApplicationContext());
                if(status == NetworkStatus.TYPE_MOBILE || status == NetworkStatus.TYPE_WIFI) {

                    // EditText값 예외처리
                    if(input_id.getText().toString().trim().length() > 0 ||
                            input_pwd.getText().toString().trim().length() > 0) {

                        // 프로그래스바 보이게 처리
                        findViewById(R.id.cpb).setVisibility(View.VISIBLE);

                        // get방식 파라미터 추가
                        HttpUrl.Builder urlBuilder = HttpUrl.parse("your server url").newBuilder();
                        urlBuilder.addQueryParameter("v", "1.0"); // 예시
                        String url = urlBuilder.build().toString();

                        // POST 파라미터 추가
                        RequestBody formBody = new FormBody.Builder()
                                .add("id", input_id.getText().toString().trim())
                                .add("pw", input_pwd.getText().toString().trim())
                                .build();

                        // 요청 만들기
                        OkHttpClient client = new OkHttpClient();
                        Request request = new Request.Builder()
                                .url(url)
                                .post(formBody)
                                .build();

                        // 응답 콜백
                        client.newCall(request).enqueue(new Callback() {
                            @Override
                            public void onFailure(Call call, IOException e) {
                                e.printStackTrace();
                            }

                            @Override
                            public void onResponse(Call call, final Response response) throws IOException {

                                // 서브 스레드 Ui 변경 할 경우 에러
                                // 메인스레드 Ui 설정
                                runOnUiThread(new Runnable() {
                                    @Override
                                    public void run() {
                                        try {
                                            // 프로그래스바 안보이게 처리
                                            findViewById(R.id.cpb).setVisibility(View.GONE);

                                            if (!response.isSuccessful()) {
                                                // 응답 실패
                                                Log.i("tag", "응답실패");
                                                Toast.makeText(getApplicationContext(), "네트워크 문제 발생", Toast.LENGTH_SHORT).show();

                                            } else {
                                                // 응답 성공
                                                Log.i("tag", "응답 성공");
                                                final String responseData = response.body().string().trim();
                                                Log.i("tag", responseData);
                                                if(responseData.equals("1")) {
                                                    Toast.makeText(getApplicationContext(), "아이디 비밀번호를 확인해주세요.", Toast.LENGTH_SHORT).show();
                                                }else {
                                                    startActivityString(MainActivity.class, "nickname", responseData);
                                                }
                                            }

                                        } catch (Exception e) {
                                            e.printStackTrace();
                                        }
                                    }
                                });

                            }
                        });
                    }else {
                        Toast.makeText(getApplicationContext(), "입력 안된 칸이 있습니다.", Toast.LENGTH_SHORT).show();
                    }

                }else {
                    Toast.makeText(getApplicationContext(), "인터넷 연결을 확인해주세요.", Toast.LENGTH_SHORT).show();
                }
            }
        });


    }

    // 액티비티 전환 함수
    // 인텐트 액티비티 전환함수
    public void startActivityC(Class c) {
        Intent intent = new Intent(getApplicationContext(), c);
        startActivity(intent);
        // 화면전환 애니메이션 없애기
        overridePendingTransition(0, 0);
    }

    // 문자열 인텐트 전달 함수
    public void startActivityString(Class c, String name , String sendString) {
        Intent intent = new Intent(getApplicationContext(), c);
        intent.putExtra(name, sendString);
        startActivity(intent);
        // 화면전환 애니메이션 없애기
        overridePendingTransition(0, 0);
    }


}
마지막으로 테스트 결과를 보여드리겠습니다.

이렇게 스틱코드를 사용해 OKHttp 라이브러리를 사용해서 회원가입, 로그인을 구현해보았습니다.
이 예제에서 사용된 스틱코드
출처 : stickode.com/detail.html?no=1306 - 안드로이드 OKHttp 통신
출처 : stickode.com/detail.html?no=1923 - 인터넷 연결확인, 네트워크 상태 체크
'안드로이드 자바' 카테고리의 다른 글
| [Java][Android] retrofit2 사용법 (2) | 2021.03.12 |
|---|---|
| [Java][Android] 리사이클러뷰 만들기 (1) | 2021.03.11 |
| [Java][Android] Visibility 속성으로 View 숨기기 (0) | 2021.03.08 |
| [Java][Android] Glide를 사용해서 이미지뷰에 이미지 띄우기 (0) | 2021.03.07 |
| [Java][Android] 번역어플 빨리 만들기 (2) | 2021.03.06 |


