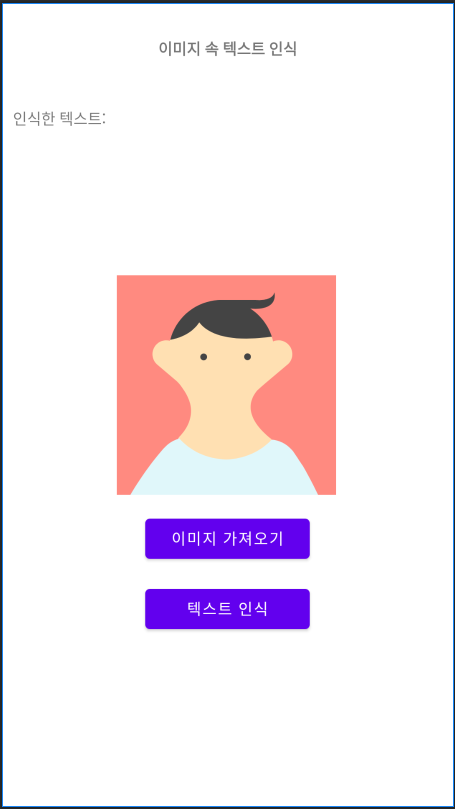
이번예제에서는 구글에서 제공하는 MLKit를 이용해 이미지 속 텍스트를 인식하는 예제를 다뤄보겠습니다.
MLKit는 Android 및 iOS 앱에서 머신러닝 관련 지식을 쉽게 이용할 수 있도록 하기위해 구글에서 제공하는 모바일 SDK입니다.
사용할 수 있는 분야는 Text Recognition, Face Detection, Barcode Scanning, Image Labeling 등 여러가지가 있으며 사용법도 크게 어렵지 않아 한 번 공부해두면 유용하게 쓰일 수 있습니다. 오늘은 이 중에서 Text Recognition을 위해 제공되는 머신러닝 모델을 이용해 텍스트 인식을 해보도록 하겠습니다.
1. 의존성 추가
앱내에서 Text Recognition 모델을 사용하기 위해 의존성을 추가해줍니다.
dependencies {
  implementation 'com.google.android.gms:play-services-mlkit-text-recognition:16.1.3'
}
2. 레이아웃 작성
다음으로 레이아웃을 작성해줍니다. 갤러리에서 텍스트가 포함된 이미지를 가져온 후, 텍스트 인식 버튼을 통해 이미지 속 텍스트를 추출하여 결과로 보여주는 간단한 레이아웃입니다.
<?xml version="1.0" encoding="utf-8"?>
<androidx.constraintlayout.widget.ConstraintLayout xmlns:android="http://schemas.android.com/apk/res/android"
    xmlns:app="http://schemas.android.com/apk/res-auto"
    xmlns:tools="http://schemas.android.com/tools"
    android:layout_width="match_parent"
    android:layout_height="match_parent"
    tools:context=".TextRecognitionActivity">
    <ImageView
        android:id="@+id/imageView"
        android:layout_width="200dp"
        android:layout_height="200dp"
        android:layout_marginTop="248dp"
        app:layout_constraintEnd_toEndOf="parent"
        app:layout_constraintHorizontal_bias="0.495"
        app:layout_constraintStart_toStartOf="parent"
        app:layout_constraintTop_toTopOf="parent"
        tools:src="@tools:sample/avatars" />

    <Button
        android:id="@+id/btn_get_image"
        android:layout_width="0dp"
        android:layout_height="wrap_content"
        android:layout_marginTop="16dp"
        android:text="이미지 가져오기"
        app:layout_constraintEnd_toEndOf="@+id/btn_detection_image"
        app:layout_constraintStart_toStartOf="@+id/btn_detection_image"
        app:layout_constraintTop_toBottomOf="@+id/imageView" />

    <Button
        android:id="@+id/btn_detection_image"
        android:layout_width="150dp"
        android:layout_height="wrap_content"
        android:layout_marginTop="16dp"
        android:text="텍스트 인식"
        app:layout_constraintEnd_toEndOf="parent"
        app:layout_constraintStart_toStartOf="parent"
        app:layout_constraintTop_toBottomOf="@+id/btn_get_image" />

    <TextView
        android:id="@+id/textView7"
        android:layout_width="wrap_content"
        android:layout_height="wrap_content"
        android:layout_marginTop="32dp"
        android:text="이미지 속 텍스트 인식"
        android:textStyle="bold"
        app:layout_constraintEnd_toEndOf="parent"
        app:layout_constraintStart_toStartOf="parent"
        app:layout_constraintTop_toTopOf="parent" />


    <LinearLayout
        android:layout_width="match_parent"
        android:layout_height="wrap_content"
        android:layout_marginTop="44dp"
        android:orientation="horizontal"
        app:layout_constraintEnd_toEndOf="parent"
        app:layout_constraintHorizontal_bias="0.0"
        app:layout_constraintStart_toStartOf="parent"
        app:layout_constraintTop_toBottomOf="@+id/textView7">

        <TextView
            android:layout_width="wrap_content"
            android:layout_height="wrap_content"
            android:layout_marginLeft="10dp"
            android:textSize="20sp"
            android:text="인식한 텍스트: "
            app:layout_constraintEnd_toEndOf="parent"
            app:layout_constraintHorizontal_bias="0.498"
            app:layout_constraintStart_toStartOf="parent"
            app:layout_constraintTop_toBottomOf="@+id/textView7"
            android:layout_marginStart="10dp" />

        <TextView
            android:id="@+id/text_info"
            android:layout_width="match_parent"
            android:layout_height="wrap_content"
            android:textSize="20sp"
            android:text=""
            android:textStyle="bold"
            app:layout_constraintEnd_toEndOf="parent"
            app:layout_constraintHorizontal_bias="0.498"
            app:layout_constraintStart_toStartOf="parent"
            app:layout_constraintTop_toBottomOf="@+id/textView7" />

    </LinearLayout>
</androidx.constraintlayout.widget.ConstraintLayout>
3. 코드 작성
텍스트 인식을 위한 코드를 작성해보겠습니다.
TextRecognitionActivity.java
public class TextRecognitionActivity extends AppCompatActivity {
    static final int REQUEST_CODE = 2;

    ImageView imageView;    // 갤러리에서 가져온 이미지를 보여줄 뷰
    Uri uri;                // 갤러리에서 가져온 이미지에 대한 Uri
    Bitmap bitmap;          // 갤러리에서 가져온 이미지를 담을 비트맵
    InputImage image;       // ML 모델이 인식할 인풋 이미지
    TextView text_info;     // ML 모델이 인식한 텍스트를 보여줄 뷰
    Button btn_get_image, btn_detection_image;  // 이미지 가져오기 버튼, 이미지 인식 버튼
    TextRecognizer recognizer;    //텍스트 인식에 사용될 모델
    @Override
    protected void onCreate(Bundle savedInstanceState) {
        super.onCreate(savedInstanceState);
        setContentView(R.layout.activity_text_recognition);

        imageView = findViewById(R.id.imageView);
        text_info = findViewById(R.id.text_info);
        recognizer = TextRecognition.getClient();    //텍스트 인식에 사용될 모델

        // GET IMAGE 버튼
        btn_get_image = findViewById(R.id.btn_get_image);
        btn_get_image.setOnClickListener(new View.OnClickListener() {
            @Override
            public void onClick(View v) {
                Intent intent = new Intent(Intent.ACTION_PICK);
                intent.setType(MediaStore.Images.Media.CONTENT_TYPE);
                startActivityForResult(intent, REQUEST_CODE);
            }
        });

        // IMAGE DETECTION 버튼
        btn_detection_image = findViewById(R.id.btn_detection_image);
        btn_detection_image.setOnClickListener(new View.OnClickListener() {
            @Override
            public void onClick(View v) {
                TextRecognition(recognizer);
            }
        });


    }

    @Override
    protected  void onActivityResult(int requestCode, int resultCode, Intent data){
        super.onActivityResult(requestCode,resultCode,data);
        if (requestCode == REQUEST_CODE) {
            // 갤러리에서 선택한 사진에 대한 uri를 가져온다.
            uri = data.getData();

            setImage(uri);
        }
    }

    // uri를 비트맵으로 변환시킨후 이미지뷰에 띄워주고 InputImage를 생성하는 메서드
    private void setImage(Uri uri) {
        try{
            InputStream in = getContentResolver().openInputStream(uri);
            bitmap = BitmapFactory.decodeStream(in);
            imageView.setImageBitmap(bitmap);

            image = InputImage.fromBitmap(bitmap, 0);
            Log.e("setImage", "이미지 to 비트맵");
        } catch (FileNotFoundException e){
            e.printStackTrace();
        }
    }

    private void TextRecognition(TextRecognizer recognizer){
        Task<Text> result = recognizer.process(image)
                // 이미지 인식에 성공하면 실행되는 리스너
                .addOnSuccessListener(new OnSuccessListener<Text>() {
                    @Override
                    public void onSuccess(Text visionText) {
                        Log.e("텍스트 인식", "성공");
                        // Task completed successfully
                        String resultText = visionText.getText();
                        text_info.setText(resultText);  // 인식한 텍스트를 TextView에 세팅
                    }
                })
                // 이미지 인식에 실패하면 실행되는 리스너
                .addOnFailureListener(
                        new OnFailureListener() {
                            @Override
                            public void onFailure(@NonNull Exception e) {
                                Log.e("텍스트 인식", "실패: " + e.getMessage());
                            }
                        });
    }
}
onActivityResult
@Override
protected  void onActivityResult(int requestCode, int resultCode, Intent data){
    super.onActivityResult(requestCode,resultCode,data);
    if (requestCode == REQUEST_CODE) {
        // 갤러리에서 선택한 사진에 대한 uri를 가져온다.
        uri = data.getData();

        setImage(uri);
    }
}
갤러리에서 선택한 이미지를 처리해주는 부분입니다.
1. 갤러리에서 이미지를 선택한 후, 선택한 이미지에 대한 uri를 가져옵니다.
2. setImage 메서드를 통해 이미지 uri를 비트맵으로 전환하게 됩니다.
setImage
// uri를 비트맵으로 변환시킨후 이미지뷰에 띄워주고 InputImage를 생성하는 메서드
private void setImage(Uri uri) {
    try{
        InputStream in = getContentResolver().openInputStream(uri);
        bitmap = BitmapFactory.decodeStream(in);
        imageView.setImageBitmap(bitmap);

        image = InputImage.fromBitmap(bitmap, 0);
        Log.e("setImage", "이미지 to 비트맵");
    } catch (FileNotFoundException e){
        e.printStackTrace();
    }
}
uri를 비트맵으로 전환해주는 메서드입니다.
uri를 비트맵으로 전환해준 후, 전환된 비트맵을 통해 InputImage 객체를 생성하게 됩니다.
생성한 InputImage 객체는 모델에 넣어주게 될 이미지입니다.
TextRecognition
private void TextRecognition(TextRecognizer recognizer){
    Task<Text> result = recognizer.process(image)
            // 이미지 인식에 성공하면 실행되는 리스너
            .addOnSuccessListener(new OnSuccessListener<Text>() {
                @Override
                public void onSuccess(Text visionText) {
                    Log.e("텍스트 인식", "성공");
                    // Task completed successfully
                    String resultText = visionText.getText();
                    text_info.setText(resultText);  // 인식한 텍스트를 TextView에 세팅
                }
            })
            // 이미지 인식에 실패하면 실행되는 리스너
            .addOnFailureListener(
                    new OnFailureListener() {
                        @Override
                        public void onFailure(@NonNull Exception e) {
                            Log.e("텍스트 인식", "실패: " + e.getMessage());
                        }
                    });
}
Input 이미지를 모델에 넣어주고 예측 결과를 처리해주는 메서드입니다.
1. 파라미터로 받은 recognizer에 생성한 InputImage를 넣어줍니다.
2. addOnSuccessListener, addOnFailureListener 리스너를 달아줘 텍스트 인식 성공, 실패에 대한 처리를 각각 나눠서 해줍니다.
저는 TextRecognition 메서드를 만들때 스틱코드를 이용해 좀 더 빠르게 구현해보았습니다.
https://stickode.com/code.html?fileno=10372 - TextDetection

4. 결과 영상
'안드로이드 자바' 카테고리의 다른 글
| [Java][Android] 카메라로 촬영해서 썸네일 띄우기 (3) | 2021.07.14 |
|---|---|
| [Java][Android] OpenCV 를 사용해서 이미지 외곽선을 따는 기능을 만들어 보자 (0) | 2021.07.09 |
| [JAVA][Android] 윈도우 오버레이 (2) | 2021.07.06 |
| [Java][Android] 동적 UI 생성 (0) | 2021.07.04 |
| [Java][Android] Shared Preferences 사용하여 이미지 저장하고 불러오기 (2) | 2021.07.03 |


