728x90
오늘은 STT(Speech to Text) 음성을 텍스트로 변환하는 예제를 구현해보도록 하겠습니다.
AndroidManifest.xml
STT에 필요한 권한을 매니페스트에 추가해줍니다.
<uses-permission android:name="android.permission.INTERNET" />
<uses-permission android:name="android.permission.RECORD_AUDIO" />
activity_main.xml
그 다음 STT를 실행할 레이아웃을 만들어줍니다.
TextView, Button이 각각 1개씩 있는 간단한 레이아웃입니다.
<?xml version="1.0" encoding="utf-8"?>
<androidx.constraintlayout.widget.ConstraintLayout xmlns:android="http://schemas.android.com/apk/res/android"
    xmlns:app="http://schemas.android.com/apk/res-auto"
    xmlns:tools="http://schemas.android.com/tools"
    android:layout_width="match_parent"
    android:layout_height="match_parent"
    tools:context=".STTActivity">

    <TextView
        android:id="@+id/sttResult"
        android:layout_width="wrap_content"
        android:layout_height="wrap_content"
        android:layout_marginTop="268dp"
        android:text="음성인식 결과가 여기에 표시됩니다."
        app:layout_constraintEnd_toEndOf="parent"
        app:layout_constraintHorizontal_bias="0.497"
        app:layout_constraintStart_toStartOf="parent"
        app:layout_constraintTop_toTopOf="parent" />

    <Button
        android:id="@+id/sttStart"
        android:layout_width="wrap_content"
        android:layout_height="wrap_content"
        android:layout_marginTop="112dp"
        android:text="음성인식 시작"
        app:layout_constraintEnd_toEndOf="parent"
        app:layout_constraintStart_toStartOf="parent"
        app:layout_constraintTop_toBottomOf="@+id/sttResult" />
</androidx.constraintlayout.widget.ConstraintLayout>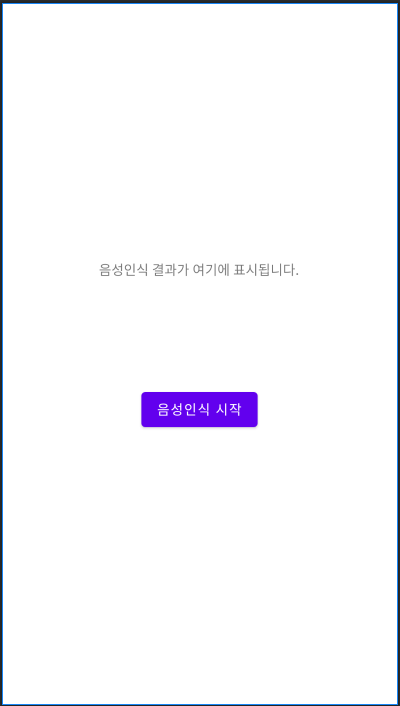
음성인식 시작 버튼을 누르면 음성인식을 시작하게 되고, 인식된 내용이 위의 TextView에 보이도록 할 예정입니다.
STTActivity.java
다음으로 STT를 실행할 코드를 작성해보겠습니다.
import android.speech.RecognitionListener;
import android.speech.RecognizerIntent;
import android.speech.SpeechRecognizer;
우선 STT를 구현하기 위해 필요한 클래스를 import해줍니다.
public class STTActivity extends AppCompatActivity {

    Intent intent;

    Button sttBtn;
    TextView textView;
    final int PERMISSION = 1;
    @Override protected void onCreate(Bundle savedInstanceState) {
        super.onCreate(savedInstanceState);
        setContentView(R.layout.activity_s_t_t);
        // 퍼미션 체크
        if ( Build.VERSION.SDK_INT >= 23 ){
            ActivityCompat.requestPermissions(this, new String[]{Manifest.permission.INTERNET, Manifest.permission.RECORD_AUDIO}, PERMISSION);
        }

        textView = findViewById(R.id.sttResult);
        sttBtn = findViewById(R.id.sttStart);

        intent=new Intent(RecognizerIntent.ACTION_RECOGNIZE_SPEECH);
        intent.putExtra(RecognizerIntent.EXTRA_CALLING_PACKAGE,getPackageName());
        intent.putExtra(RecognizerIntent.EXTRA_LANGUAGE,"ko-KR");   // 텍스트로 변환시킬 언어 설정

        sttBtn.setOnClickListener(v -> {
            SpeechRecognizer mRecognizer = SpeechRecognizer.createSpeechRecognizer(this);
            mRecognizer.setRecognitionListener(listener);
            mRecognizer.startListening(intent);
        });
    }

    private RecognitionListener listener = new RecognitionListener() {
        @Override
        public void onReadyForSpeech(Bundle params) {
            Toast.makeText(getApplicationContext(),"음성인식을 시작합니다.",Toast.LENGTH_SHORT).show();
        }

        @Override
        public void onBeginningOfSpeech() {}

        @Override
        public void onRmsChanged(float rmsdB) {}

        @Override
        public void onBufferReceived(byte[] buffer) {}

        @Override
        public void onEndOfSpeech() {}

        @Override
        public void onError(int error) {
            String message;

            switch (error) {
                case SpeechRecognizer.ERROR_AUDIO:
                    message = "오디오 에러";
                    break;
                case SpeechRecognizer.ERROR_CLIENT:
                    message = "클라이언트 에러";
                    break;
                case SpeechRecognizer.ERROR_INSUFFICIENT_PERMISSIONS:
                    message = "퍼미션 없음";
                    break;
                case SpeechRecognizer.ERROR_NETWORK:
                    message = "네트워크 에러";
                    break;
                case SpeechRecognizer.ERROR_NETWORK_TIMEOUT:
                    message = "네트웍 타임아웃";
                    break;
                case SpeechRecognizer.ERROR_NO_MATCH:
                    message = "찾을 수 없음";
                    break;
                case SpeechRecognizer.ERROR_RECOGNIZER_BUSY:
                    message = "RECOGNIZER가 바쁨";
                    break;
                case SpeechRecognizer.ERROR_SERVER:
                    message = "서버가 이상함";
                    break;
                case SpeechRecognizer.ERROR_SPEECH_TIMEOUT:
                    message = "말하는 시간초과";
                    break;
                default:
                    message = "알 수 없는 오류임";
                    break;
            }

            Toast.makeText(getApplicationContext(), "에러가 발생하였습니다. : " + message,Toast.LENGTH_SHORT).show();
        }

        @Override
        public void onResults(Bundle results) {
            // 말을 하면 ArrayList에 단어를 넣고 textView에 단어를 이어준다.
            ArrayList<String> matches =
                    results.getStringArrayList(SpeechRecognizer.RESULTS_RECOGNITION);

            for(int i = 0; i < matches.size() ; i++){
                textView.setText(matches.get(i));
            }
        }

        @Override
        public void onPartialResults(Bundle partialResults) {}

        @Override
        public void onEvent(int eventType, Bundle params) {}
    };

}
음성인식에 필요한 리스너를 만들고 Recognizer에 리스너를 세팅해줍니다.
음성인식 시작 버튼을 클릭하면 리스너를 통해 음성을 인식한 후, 리스너 안에 있는 onResults 메서드를 통해 결과를 보여주게 됩니다.
저는 리스너를 만들때 스틱코드를 활용하여 좀 더 빠르게 구현해보았습니다.
stickode.com/code.html?fileno=10196 - SST_Listener
STICKODE - 코드 등록하기
스틱코드에서 개발에 필요한 전세계의 모든 코드들을 찾아보세요! Java, Android, Kotlin, PHP 등의 수 많은 언어와 플랫폼을 지원합니다.
stickode.com

위 예제를 통해 아래의 결과를 확인할 수 있습니다.
동영상 서비스가 종료되어 해당 콘텐츠를 재생할 수 없습니다.
'안드로이드 자바' 카테고리의 다른 글
| [JAVA][android] WiFi정보 스캔 빠르게 구현하기 (0) | 2021.06.09 |
|---|---|
| [JAVA][Android] 로또 QR 코드 웹뷰 띄워주기 (0) | 2021.06.08 |
| [JAVA][Android] 스위치 버튼으로 배경음악 on/off 하기 (0) | 2021.06.03 |
| [JAVA][Android] Animation을 활용한 하트 ToggleButton (2) | 2021.05.29 |
| [Java][Android] 안드로이드 TTS (0) | 2021.05.26 |


