이번 예제에서는 텍스트를 음성으로 변환해주는 TTS 기능을 구현해보도록 하겠습니다.
우선 TTS기능을 사용하기 위해 음성인식에 필요한 권한을 매니패스트에 추가해줍니다.
권한 설정
<uses-permission android:name="android.permission.RECORD_AUDIO" />
레이아웃 그리기
다음으로 예제를 진행하기 위한 레이아웃을 그려보도록 하겠습니다.
<?xml version="1.0" encoding="utf-8"?>
<androidx.constraintlayout.widget.ConstraintLayout xmlns:android="http://schemas.android.com/apk/res/android"
    xmlns:app="http://schemas.android.com/apk/res-auto"
    xmlns:tools="http://schemas.android.com/tools"
    android:layout_width="match_parent"
    android:layout_height="match_parent"
    tools:context=".TTSActivity">

    <EditText
        android:id="@+id/txtText"
        android:layout_width="250dp"
        android:layout_height="wrap_content"
        android:layout_marginTop="100dp"
        android:inputType="text"
        app:layout_constraintEnd_toEndOf="parent"
        app:layout_constraintHorizontal_bias="0.045"
        app:layout_constraintStart_toStartOf="parent"
        app:layout_constraintTop_toTopOf="parent" />

    <Button
        android:id="@+id/btnSpeak"
        android:layout_width="wrap_content"
        android:layout_height="wrap_content"
        android:layout_marginStart="24dp"
        android:layout_marginLeft="24dp"
        android:text="tts"
        app:layout_constraintBottom_toBottomOf="@+id/txtText"
        app:layout_constraintStart_toEndOf="@+id/txtText"
        app:layout_constraintTop_toTopOf="@+id/txtText"
        app:layout_constraintVertical_bias="0.0" />


</androidx.constraintlayout.widget.ConstraintLayout>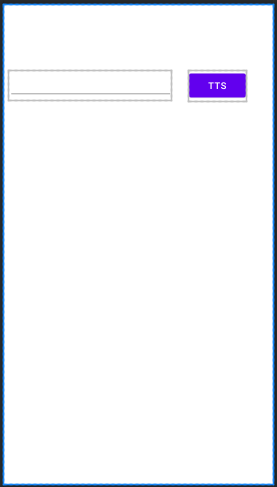
레이아웃은 EditText와 버튼 각각 1개씩 있는 간단한 형태입니다. EditText에 글자를 입력 후, TTS 버튼을 누르면 음성으로 입력한 글자를 읽어주는 식으로 동작하도록 구현할 예정입니다.
코드 작성
다음으로 액티비티 코드를 작성해보도록 하겠습니다.
우선 TextToSpeech 클래스를 import 해줍니다.
import android.speech.tts.TextToSpeech;
전체코드
TTSActivity.java
public class TTSActivity extends AppCompatActivity {

    private TextToSpeech tts;
    private Button btn_Speak;
    private EditText txtText;

    @Override
    protected void onCreate(Bundle savedInstanceState) {
        super.onCreate(savedInstanceState);
        setContentView(R.layout.activity_t_t_s);

        tts = new TextToSpeech(this, new TextToSpeech.OnInitListener() {
            @Override
            public void onInit(int status) {
                if(status!=android.speech.tts.TextToSpeech.ERROR) {
                    tts.setLanguage(Locale.KOREAN);
                }
            }
        });

        btn_Speak = findViewById(R.id.btnSpeak);
        txtText = findViewById(R.id.txtText);

        btn_Speak.setOnClickListener(new View.OnClickListener() {
            @RequiresApi(api = Build.VERSION_CODES.LOLLIPOP)
            @Override public void onClick(View v) {
                String text = txtText.getText().toString();

                tts.setPitch(1.0f);
                tts.setSpeechRate(1.0f);
                tts.speak(text, TextToSpeech.QUEUE_FLUSH, null);
                }
        });
    }

    @Override public void onDestroy() {
        if (tts != null) {
            tts.stop();
            tts.shutdown();
            tts = null;
        }
        super.onDestroy();
    }
}
tts 객체 초기화
tts = new TextToSpeech(this, new TextToSpeech.OnInitListener() {
    @Override
    public void onInit(int status) {
        if(status!=android.speech.tts.TextToSpeech.ERROR) {
            tts.setLanguage(Locale.KOREAN);
        }
    }
});
위 코드와 같이 tts 객체를 초기화 시켜줍니다.
tts.setLanguage() 메서드를 통해 음성변환 언어를 지정해줍니다. 이 예제에서는 한국어로 설정해주었습니다.
TTS 버튼 클릭리스너 설정
btn_Speak.setOnClickListener(new View.OnClickListener() {
    @RequiresApi(api = Build.VERSION_CODES.LOLLIPOP)
    @Override public void onClick(View v) {
        String text = txtText.getText().toString();

        tts.setPitch(1.0f);
        tts.setSpeechRate(1.0f);
        tts.speak(text, TextToSpeech.QUEUE_FLUSH, null);
        }
});
TTS 버튼을 클릭 시 EditText에 입력된 문자를 가져옵니다.
그 후, tts객체에 pitch(높낮이)와 rate(빠르기)를 설정해준뒤 speak() 메서드를 통해 가져온 문자열을 음성변환 시켜줍니다.
tts 객체 정리
@Override public void onDestroy() {
    if (tts != null) {
        tts.stop();
        tts.shutdown();
        tts = null;
    }
    super.onDestroy();
}
액티비티 종료 시, 사용한 tts 객체를 정리해줍니다.
tts관련 코드 작성 시, 아래 이미지와 같이 스틱코드에 저장된 코드를 가져와 좀 더 빠르게 구현해보았습니다.


stickode.com/code.html?fileno=10124 - tts_speak
stickode.com/code.html?fileno=10123 - tts_init
STICKODE - 코드 등록하기
스틱코드에서 개발에 필요한 전세계의 모든 코드들을 찾아보세요! Java, Android, Kotlin, PHP 등의 수 많은 언어와 플랫폼을 지원합니다.
stickode.com
결과
동영상 서비스가 종료되어 해당 콘텐츠를 재생할 수 없습니다.
'안드로이드 자바' 카테고리의 다른 글
| [JAVA][Android] 스위치 버튼으로 배경음악 on/off 하기 (0) | 2021.06.03 |
|---|---|
| [JAVA][Android] Animation을 활용한 하트 ToggleButton (2) | 2021.05.29 |
| [JAVA][Android] 핸들러를 활용한 타이머 구현하기 (0) | 2021.05.22 |
| [Java][Android] GPS Permission (2) | 2021.05.21 |
| [JAVA][Android] 원형 프로그레스바 타이머 (0) | 2021.05.18 |


