오늘은 간단한 알림창을 띄우는 예제를 작성해보도록 하겠습니다. 알림창의 형태는 기본 아이콘이 보여지고 알림 제목, 알림 내용이 들어있는 기본 알림입니다.
1. xml 작성
버튼이 하나 있는 간단한 레이아웃입니다. 버튼 클릭 시 설정한 알림을 띄우도록 구현할 예정입니다.
activity_notification.xml
<?xml version="1.0" encoding="utf-8"?>
<androidx.constraintlayout.widget.ConstraintLayout xmlns:android="http://schemas.android.com/apk/res/android"
    xmlns:app="http://schemas.android.com/apk/res-auto"
    xmlns:tools="http://schemas.android.com/tools"
    android:layout_width="match_parent"
    android:layout_height="match_parent"
    tools:context=".NotificationActivity">

    <Button
        android:id="@+id/btn_set_notification"
        android:layout_width="wrap_content"
        android:layout_height="wrap_content"
        android:text="알림창 띄우기"
        app:layout_constraintBottom_toBottomOf="parent"
        app:layout_constraintEnd_toEndOf="parent"
        app:layout_constraintStart_toStartOf="parent"
        app:layout_constraintTop_toTopOf="parent"
        app:layout_constraintVertical_bias="0.338" />

</androidx.constraintlayout.widget.ConstraintLayout>
2. 코드 작성
액티비티에서 버튼을 클릭 시 설정해놓은 알림을 띄워주는 코드입니다.
알림채널을 생성하는 메소드와 알림을 띄워주는 메소드를 나누어서 작성했습니다.
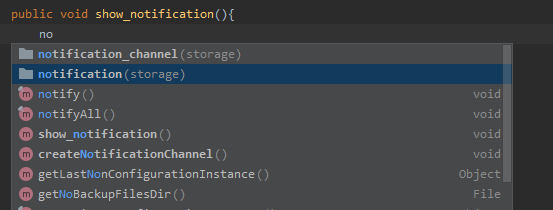
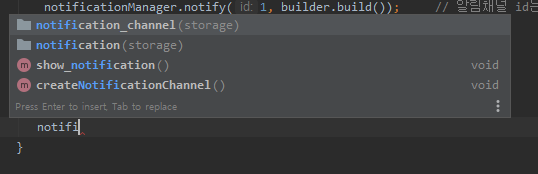
알림채널 생성 코드와 알림 띄워주는 코드는 스틱코드에 저장해놓은 코드를 불러와 빠르게 작성해보았습니다.
아래 url로 이동하시면 코드를 사용하실 수 있습니다.
stickode.com/code.html?fileno=9921 - notification
stickode.com/code.html?fileno=9920 - notification_channel
NotificationActivity.java
public class NotificationActivity extends AppCompatActivity {

    @Override
    protected void onCreate(Bundle savedInstanceState) {
        super.onCreate(savedInstanceState);
        setContentView(R.layout.activity_notification);

        Button btn_set_notification = findViewById(R.id.btn_set_notification);
        btn_set_notification.setOnClickListener(new View.OnClickListener() {
            @Override
            public void onClick(View v) {
                createNotificationChannel();
                show_notification();
            }
        });

    }


    public void show_notification(){
        // 알림 탭 액션 세팅
        Intent intent = new Intent(this, NotificationActivity.class);
        intent.setFlags(Intent.FLAG_ACTIVITY_NEW_TASK | Intent.FLAG_ACTIVITY_CLEAR_TASK);
        PendingIntent pendingIntent = PendingIntent.getActivity(this, 0, intent, 0);

        // 알림 컨텐츠(아이콘, 제목, 내용)와 알림 채널 세팅
        NotificationCompat.Builder builder = new NotificationCompat.Builder(this, "ID")
        .setSmallIcon(R.drawable.ic_launcher_background)    // 알림 스몰 아이콘
        .setContentTitle("notification example title")      // 알림 제목
        .setContentText("notification example content")     // 알림 내용

        // 기본적으로, 알림 텍스트는 한줄로 보이게 된다.
        // 만약 긴 텍스트를 보여주고 싶다먼, setStyle(). 을 통해 확장가능한 알림을 사용하면 된다.
        //  .setStyle(new NotificationCompat.BigTextStyle()
        //          .bigText("Much longer text that cannot fit one line..."))

        .setContentIntent(pendingIntent)    // 유저가 알림을 탭할때 발생할 인텐트를 세팅
        .setAutoCancel(true)                // 유저가 알림을 탭하면 알림이 자동으로 종료됨
        .setPriority(NotificationCompat.PRIORITY_DEFAULT);

        // 알림 보여주기
        NotificationManagerCompat notificationManager = NotificationManagerCompat.from(this);
        notificationManager.notify(1, builder.build());     // 알림채널 id는 각각의 알림마다 세팅해줘야하는 고유의 int값이다.
    }


    // 알림 채널 생성 및 importance 세팅
    private void createNotificationChannel() {
       // 알림 채널 생성
       if (Build.VERSION.SDK_INT >= Build.VERSION_CODES.O) {
           CharSequence name = "channel name";
           String description = "channel_description";
           int importance = NotificationManager.IMPORTANCE_DEFAULT;
           NotificationChannel channel = new NotificationChannel("ID", name, importance);
           channel.setDescription(description);

           // 시스템에 채널 등록하기, 채널 등록 후에는 importance나 알림 행동을 바꿀 수 없다.
           NotificationManager notificationManager = getSystemService(NotificationManager.class);
           notificationManager.createNotificationChannel(channel);
       }
    }
}
show_notification (NotificationActivity.java) 메소드
public void show_notification(){
    // 알림 탭 액션 세팅
    Intent intent = new Intent(this, NotificationActivity.class);
    intent.setFlags(Intent.FLAG_ACTIVITY_NEW_TASK | Intent.FLAG_ACTIVITY_CLEAR_TASK);
    PendingIntent pendingIntent = PendingIntent.getActivity(this, 0, intent, 0);

    // 알림 컨텐츠(아이콘, 제목, 내용)와 알림 채널 세팅
    NotificationCompat.Builder builder = new NotificationCompat.Builder(this, "ID")
    .setSmallIcon(R.drawable.ic_launcher_background)    // 알림 스몰 아이콘
    .setContentTitle("notification example title")      // 알림 제목
    .setContentText("notification example content")     // 알림 내용

    // 기본적으로, 알림 텍스트는 한줄로 보이게 된다.
    // 만약 긴 텍스트를 보여주고 싶다먼, setStyle(). 을 통해 확장가능한 알림을 사용하면 된다.
    //  .setStyle(new NotificationCompat.BigTextStyle()
    //          .bigText("Much longer text that cannot fit one line..."))

    .setContentIntent(pendingIntent)    // 유저가 알림을 탭할때 발생할 인텐트를 세팅
    .setAutoCancel(true)                // 유저가 알림을 탭하면 알림이 자동으로 종료됨
    .setPriority(NotificationCompat.PRIORITY_DEFAULT);

    // 알림 보여주기
    NotificationManagerCompat notificationManager = NotificationManagerCompat.from(this);
    notificationManager.notify(1, builder.build());     // 알림채널 id는 각각의 알림마다 세팅해줘야하는 고유의 int값이다.
}
유저가 알림을 탭할시 발생될 액션을 PendingIntent를 통해 세팅해줍니다. 여기선 탭할 시 NotificationActivity로 이동하도록 했습니다.
그 다음 알림 컨텐츠와 알림 채널을 세팅해주었습니다. 알림 컨텐츠는 기본적으로 작은 아이콘, 제목, 내용이 들어가야 되고 추가적으로 다른 내용들을 넣을 수 있습니다. 추가적인 내용은 안드로이드 디벨로퍼 사이트를 참고하시면 됩니다.
3. 결과
위 내용대로 구현하면 아래와 같은 결과를 확인하실 수 있습니다.
'안드로이드 자바' 카테고리의 다른 글
| [Java][Android] 토글 버튼(ToggleButton) 사용법 (0) | 2021.04.26 |
|---|---|
| [Java][Android] 예외처리하기 (0) | 2021.04.25 |
| [Java][Android] 다크모드 구현하기 (2) | 2021.04.22 |
| [JAVA][Android] 만보계를 만들어 보자 (8) | 2021.04.21 |
| [Java][Android] 가로형, 그리드형 리싸이클러뷰 만들기 (0) | 2021.04.19 |


