728x90
안녕하세요.
오늘은 텐서플로우로 데이터셋 증강하는 예제를 진행하겠습니다.
이 예제는 앞선 예제인 'Tensorflow 로 나만의 데이터셋 만들기' 에서 이어지는 예제입니다.
먼저, 구글 colab을 이용해서 예제를 진행하겠습니다.
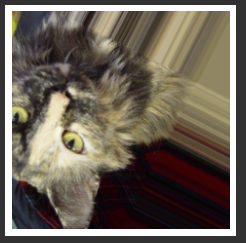
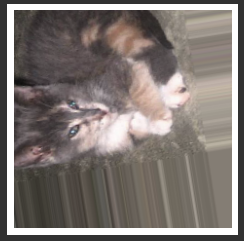
데이터셋은 대표적인 예제인 개고양이 데이터셋을 사용하겠습니다.
먼저, 데이터셋을 불러오겠습니다.
#데이터셋 불러오기

import os
import zipfile

!wget --no-check-certificate \
https://storage.googleapis.com/mledu-datasets/cats_and_dogs_filtered.zip \
-O /content/cats_and_dogs_filtered.zip

local_zip = '/content/cats_and_dogs_filtered.zip'

zip_ref = zipfile.ZipFile(local_zip, 'r')

zip_ref.extractall('/content')
zip_ref.close()
데이터셋 경로를 출력하겠습니다.
# 기본 경로
base_dir = '/content/cats_and_dogs_filtered'

train_dir = os.path.join(base_dir, 'train')
validation_dir = os.path.join(base_dir, 'validation')

# 훈련에 사용되는 고양이/개 이미지 경로
train_cats_dir = os.path.join(train_dir, 'cats')
train_dogs_dir = os.path.join(train_dir, 'dogs')
print(train_cats_dir)
print(train_dogs_dir)

# 테스트에 사용되는 고양이/개 이미지 경로
validation_cats_dir = os.path.join(validation_dir, 'cats')
validation_dogs_dir = os.path.join(validation_dir, 'dogs')
print(validation_cats_dir)
print(validation_dogs_dir)
이제 데이터 증강 옵션을 적용해보겠습니다.
데이터 증강에는 keras의 ImageDataGenerator 를 사용하겠습니다.
datagen = tf.keras.preprocessing.image.ImageDataGenerator(rotation_range = 90,
                            width_shift_range=0.4,
                            height_shift_range=0.4,
                            vertical_flip =True,
                            horizontal_flip =True,)
- shear_range : Float, Shear Intensity ( share angle in counter-clockwise direction as radians)
- 입력한 수치 내에서 반시계 방향으로 이미지를 늘리거나 찌그러트립니다.
- zoom_range : Float or [lower, upper]. Range for random zoom.
- 입력한 값의 범위내에 임의로 원본이미지를 확대 / 축소 합니다.
- (1 - 수치) ~ (1+ 수치) 사이의 범위로 확대 축소를 합니다.
- ex) zoom_range = 0.3
- horizontal / vertical_flip : Boolean, Randomly flip inputs horizontally. 수평/ 수직 방향으로 뒤집는 반전 옵션(true / false)
- rescale : rescaling factor. Defaults to None. If None or 0, no rescaling is applied, otherwise we multipy the data by the value provided (before applying any other transformation)
- 일반적으로 1./255 값을 많이 사용합니다.
- 이미지에서 rgb값인 255는 모델에서 처리하기 높은 값으로 이를 255로 나누어 0~1 사이의 값으로 변환시키는 옵션입니다.
- rotaion_range : 지정된 각도 범위내에서 임의로 원본 이미지를 회전 시킵니다. ex) rotaion_range=90
- width / hight_shift_range : 지정된 수평 / 수직 방향으로 입력값 내에서 임의로 원본 이미지를 이동 시킵니다.
- 수치는 전체 넓이의 비율(실수)로 나타냅니다.
- ex) width_shift_range = 0.1이면 이미지의 width값이 300이라면 10%인 10px만큼 좌우로 이동합니다.
이제 데이터셋에 적용하고 확인해 보겠습니다.
#학습 데이터셋 생성
train_set = datagen.flow_from_directory(directory = base_dir,
                                        target_size = (224,224),
                                        class_mode='categorical',
                                        subset='training',
                                        batch_size = 32)
#이미지 확인
from matplotlib.image import imread
import matplotlib.pyplot as plt
import numpy as np
def get_class_string_from_index(index):
for class_string, class_index in train_set.class_indices.items():
if class_index == index:
return class_string
#x, y = next(image_data)
x, y = next(train_set)
image = x[0, :, :, :]
plt.imshow((image).astype(np.uint8))
plt.axis('off')
plt.show()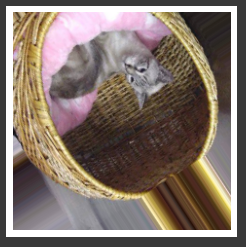
'Python' 카테고리의 다른 글
| [Python] Tensorflow 로 분류모델 전이학습하기 (0) | 2023.03.27 |
|---|---|
| [Python] venv로 가상 환경 사용하기 (0) | 2023.02.26 |
| [Python] decimal 모듈을 사용해서 부동소수점 오차 해결하기 (0) | 2023.02.17 |
| [Python] Tensorflow 에서 모델 저장하고 불러오기 (0) | 2023.02.16 |
| [Python] pprint 모듈 사용해보기 (0) | 2023.02.03 |


