오늘은 어플리케이션에 원하는 폰트를 일괄적으로 적용하는 법을 소개하겠습니다.
developer.android.com/guide/topics/resources/font-resource?hl=ko
글꼴 리소스 | Android 개발자 | Android Developers
글꼴 리소스는 앱에서 사용할 수 있는 맞춤 글꼴을 정의합니다. 글꼴은 개별 글꼴 파일 또는 글꼴 모음이라고 하는 글꼴 파일 모임일 수 있으며 XML로 정의됩니다. 또한, XML로 글꼴을 정의하는 방
developer.android.com
먼저, 원하는 폰트 파일을 준비합니다.
저는 네이버에서 나눔손글씨 붓체, 펜체 파일을 다운 받았습니다.
1. font 디렉토리 생성
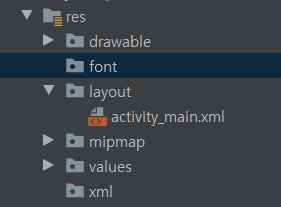
먼저, res 폴더에 font 폴더를 생성해줍니다.
순서대로 res -> New -> Android Resource Directory를 클릭합니다.

Resource Type을 font로 변경해줍니다.

앞에서 말한대로 따라왔다면, res 폴더에 font 디렉토리가 생성됩니다.

2. font 디렉토리에 폰트 파일 추가
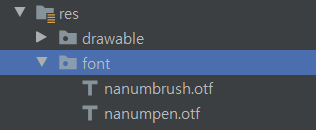
이제, font 디렉토리에 적용하고 싶은 폰트 파일을 넣어주면 됩니다.
폰트 파일의 이름에 대문자를 포함하면 안됩니다.
폰트 파일의 파일명을 소문자로 수정한 뒤, 파일을 추가해주시거나 Refactor 해주시면 됩니다.

저는 네이버에서 다운받은 나눔손글씨 붓체(nanumbrush.otf), 펜체(nanumpen.otf) 파일을 넣었습니다.
3. XML에 폰트(글꼴) 정의
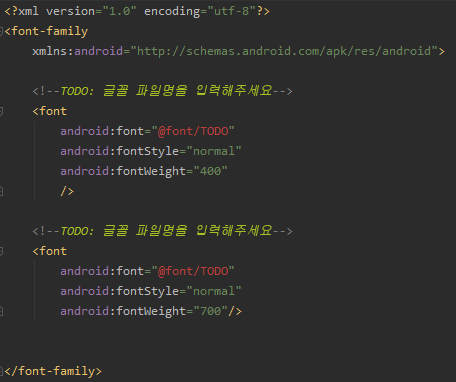
font 디렉토리에서 새로운 font resource file을 생성합니다.


xml파일에서 font 라고 입력하면 나오는 custom_font_family 를 클릭해주세요
그리고 자동완성된 코드에 있는 TODO 부분에 원하는 폰트 파일명을 입력해주세요.

<font_custom.xml>
<?xml version="1.0" encoding="utf-8"?>
<font-family
    xmlns:android="http://schemas.android.com/apk/res/android">

    <font
        android:font="@font/nanumbrush"
        android:fontStyle="normal"
        android:fontWeight="400"
        />

    <font
        android:font="@font/nanumpen"
        android:fontStyle="normal"
        android:fontWeight="700"/>

</font-family>
4. font-family style 적용
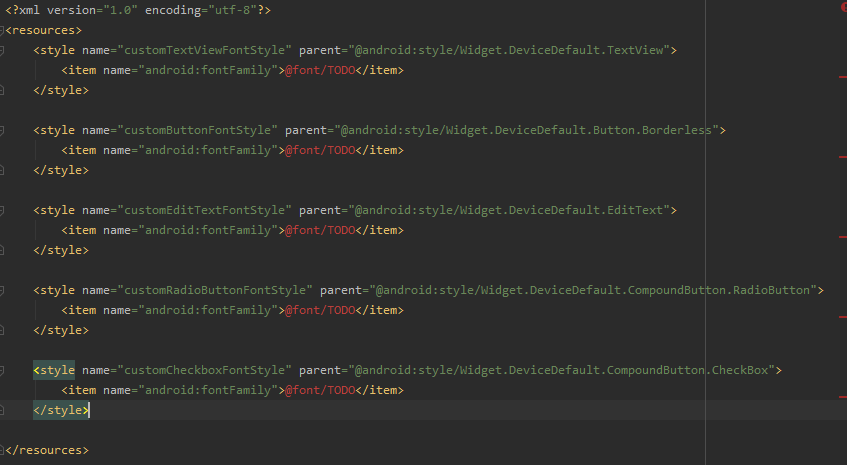
res -> values 폴더에 font_style 파일을 생성하고

font라고 검색하면 뜨는 font style 을 클릭하여 코드를 불러옵니다.


기본으로 불러온 코드에 TODO 부분에 글꼴을 정의했던 XML 파일 명을 입력해줍니다.
<font_style.xml>
<?xml version="1.0" encoding="utf-8"?>
<resources>
    <style name="customTextViewFontStyle" parent="@android:style/Widget.DeviceDefault.TextView">
        <item name="android:fontFamily">@font/font_custom</item>
    </style>

    <style name="customButtonFontStyle" parent="@android:style/Widget.DeviceDefault.Button.Borderless">
        <item name="android:fontFamily">@font/font_custom</item>
    </style>

    <style name="customEditTextFontStyle" parent="@android:style/Widget.DeviceDefault.EditText">
        <item name="android:fontFamily">@font/font_custom</item>
    </style>

    <style name="customRadioButtonFontStyle" parent="@android:style/Widget.DeviceDefault.CompoundButton.RadioButton">
        <item name="android:fontFamily">@font/font_custom</item>
    </style>

    <style name="customCheckboxFontStyle" parent="@android:style/Widget.DeviceDefault.CompoundButton.CheckBox">
        <item name="android:fontFamily">@font/font_custom</item>
    </style>

</resources>
5. values -> styles.xml 에 폰트 스타일 적용


해당 Theme에 sty 까지 입력하면, style 등록에 필요한 코드가 자동완성 됩니다.

<styles.xml>
<resources>
    <!-- Base application theme. -->
    <style name="AppTheme" parent="Theme.AppCompat.Light.DarkActionBar">
        <!-- Customize your theme here. -->
        <item name="colorPrimary">@color/colorPrimary</item>
        <item name="colorPrimaryDark">@color/colorPrimaryDark</item>
        <item name="colorAccent">@color/colorAccent</item>

        <item name="android:textViewStyle">@style/customTextViewFontStyle</item>
        <item name="android:buttonStyle">@style/customButtonFontStyle</item>
        <item name="android:editTextStyle">@style/customEditTextFontStyle</item>
        <item name="android:radioButtonStyle">@style/customRadioButtonFontStyle</item>
        <item name="android:checkboxStyle">@style/customCheckboxFontStyle</item>
    </style>

</resources>
6. layout에 적용하기
activity_main.xml 에 가서 텍스트뷰를 두개 추가해봅니다.
스틱코드를 활용한다면 te까지만 입력해도 textview의 기본 코드가 작성됩니다.

하나의 텍스트뷰는 normal, 나머지 하나는 bold 로 설정해주고
나머지 항목을 원하는 대로 수정해주세요.
<?xml version="1.0" encoding="utf-8"?>
<LinearLayout
    xmlns:android="http://schemas.android.com/apk/res/android"
    xmlns:app="http://schemas.android.com/apk/res-auto"
    xmlns:tools="http://schemas.android.com/tools"
    android:layout_width="match_parent"
    android:layout_height="match_parent"
    tools:context=".MainActivity"
    android:orientation="vertical">

    <TextView
        android:id="@+id/textViewNormal"
        android:layout_width="wrap_content"
        android:layout_height="wrap_content"
        android:text="글꼴 normal 나눔손글씨 붓"
        android:textStyle="normal"
        android:textSize="40sp"
        android:padding="40dp"/>

    <TextView
        android:id="@+id/textViewBold"
        android:layout_width="wrap_content"
        android:layout_height="wrap_content"
        android:text="글꼴 bold 나눔손글씨 펜"
        android:textStyle="bold"
        android:textSize="40sp"
        android:padding="40dp"/>
</LinearLayout>
적용 후 화면

normal 은 나눔손글씨 붓, bold로 설정한 텍스트뷰는 나눔손글씨 펜 글꼴로 출력되는 걸 확인할 수 있습니다.
활용 스틱코드
'안드로이드 자바' 카테고리의 다른 글
| [JAVA][안드로이드] TelephonyManager를 이용한 mp3 플레이어 제어 빠르게 구현 하기 (0) | 2021.03.25 |
|---|---|
| [Java][안드로이드] 시간 입력 커스텀 다이얼로그 빠르게 만들기 (0) | 2021.03.24 |
| [Kotlin][Android] WebView를 사용해서 웹 페이지 띄우기 (0) | 2021.03.21 |
| [Java][Android] 리사이클러뷰 검색 필터링 구현하기 (0) | 2021.03.20 |
| [Java][Android] 프로그래스바 커스텀하기 (0) | 2021.03.19 |


