안녕하세요.
오늘은 저번 시간에 작성한 "SMS 발송 기능"에 인증번호를 보내서 인증하는 기능을 만들어 보겠습니다.
- 스틱코드?
STICKODE
stickode.com
- SMS 발송 기능
https://stickode.tistory.com/44
1. 레이아웃
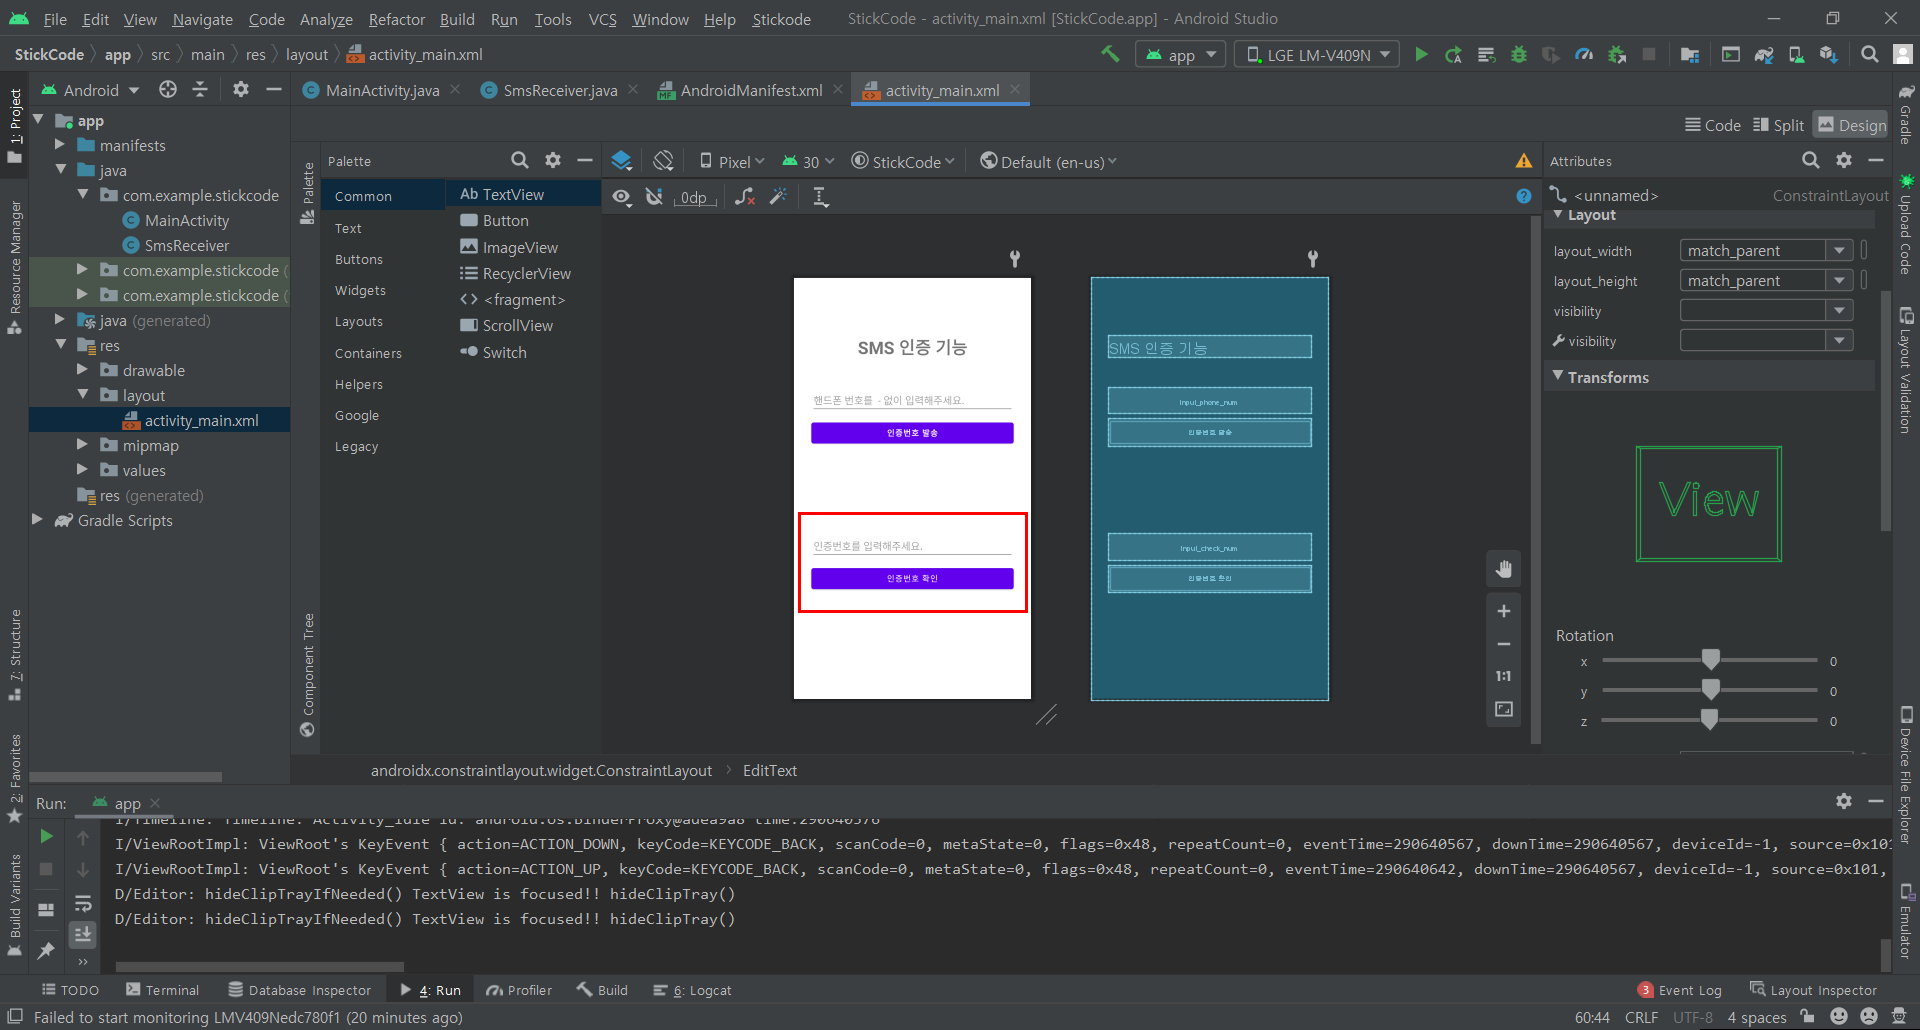
▶ 인증번호를 확인하는 인풋창과 버튼을 만들어줍니다.
▶ 아래는 레이아웃에 대한 전체 코드입니다.
- activity_main.xml
<?xml version="1.0" encoding="utf-8"?>
<androidx.constraintlayout.widget.ConstraintLayout xmlns:android="http://schemas.android.com/apk/res/android"
    xmlns:app="http://schemas.android.com/apk/res-auto"
    xmlns:tools="http://schemas.android.com/tools"
    android:layout_width="match_parent"
    android:layout_height="match_parent"
    tools:context=".MainActivity">

    <TextView
        android:id="@+id/title"
        android:layout_width="0dp"
        android:layout_height="wrap_content"
        android:layout_marginTop="100dp"
        android:text="SMS 인증 기능"
        android:textSize="30dp"
        android:textStyle="bold"
        android:gravity="center"
        app:layout_constraintEnd_toEndOf="@+id/input_phone_num"
        app:layout_constraintRight_toRightOf="parent"
        app:layout_constraintStart_toStartOf="@+id/input_phone_num"
        app:layout_constraintTop_toTopOf="parent" />

    <EditText
        android:id="@+id/input_phone_num"
        android:layout_height="wrap_content"
        android:layout_width="match_parent"
        android:layout_marginStart="30dp"
        android:layout_marginTop="50dp"
        android:layout_marginEnd="30dp"
        android:ems="10"
        android:hint="핸드폰 번호를  - 없이 입력해주세요."
        android:inputType="textPersonName"
        app:layout_constraintEnd_toEndOf="parent"
        app:layout_constraintStart_toStartOf="parent"
        app:layout_constraintTop_toBottomOf="@+id/title"
         />


    <Button
        android:id="@+id/send_sms_button"
        android:layout_width="0dp"
        android:layout_height="wrap_content"
        android:layout_marginTop="10dp"
        android:text="인증번호 발송"
        android:textStyle="bold"
        app:layout_constraintEnd_toEndOf="@+id/input_phone_num"
        app:layout_constraintStart_toStartOf="@+id/input_phone_num"
        app:layout_constraintTop_toBottomOf="@+id/input_phone_num" />

    <EditText
        android:id="@+id/input_check_num"
        android:layout_width="0dp"
        android:layout_height="wrap_content"
        android:layout_marginTop="150dp"
        android:ems="10"
        android:inputType="textPersonName"
        android:hint="인증번호를 입력해주세요."
        app:layout_constraintEnd_toEndOf="@+id/send_sms_button"
        app:layout_constraintStart_toStartOf="@+id/send_sms_button"
        app:layout_constraintTop_toBottomOf="@+id/send_sms_button" />

    <Button
        android:id="@+id/check_button"
        android:layout_width="0dp"
        android:layout_height="wrap_content"
        android:layout_marginTop="10dp"
        android:text="인증번호 확인"
        app:layout_constraintEnd_toEndOf="@+id/input_check_num"
        app:layout_constraintStart_toStartOf="@+id/input_check_num"
        app:layout_constraintTop_toBottomOf="@+id/input_check_num" />


</androidx.constraintlayout.widget.ConstraintLayout>
2. SMS 인증 기능 추가
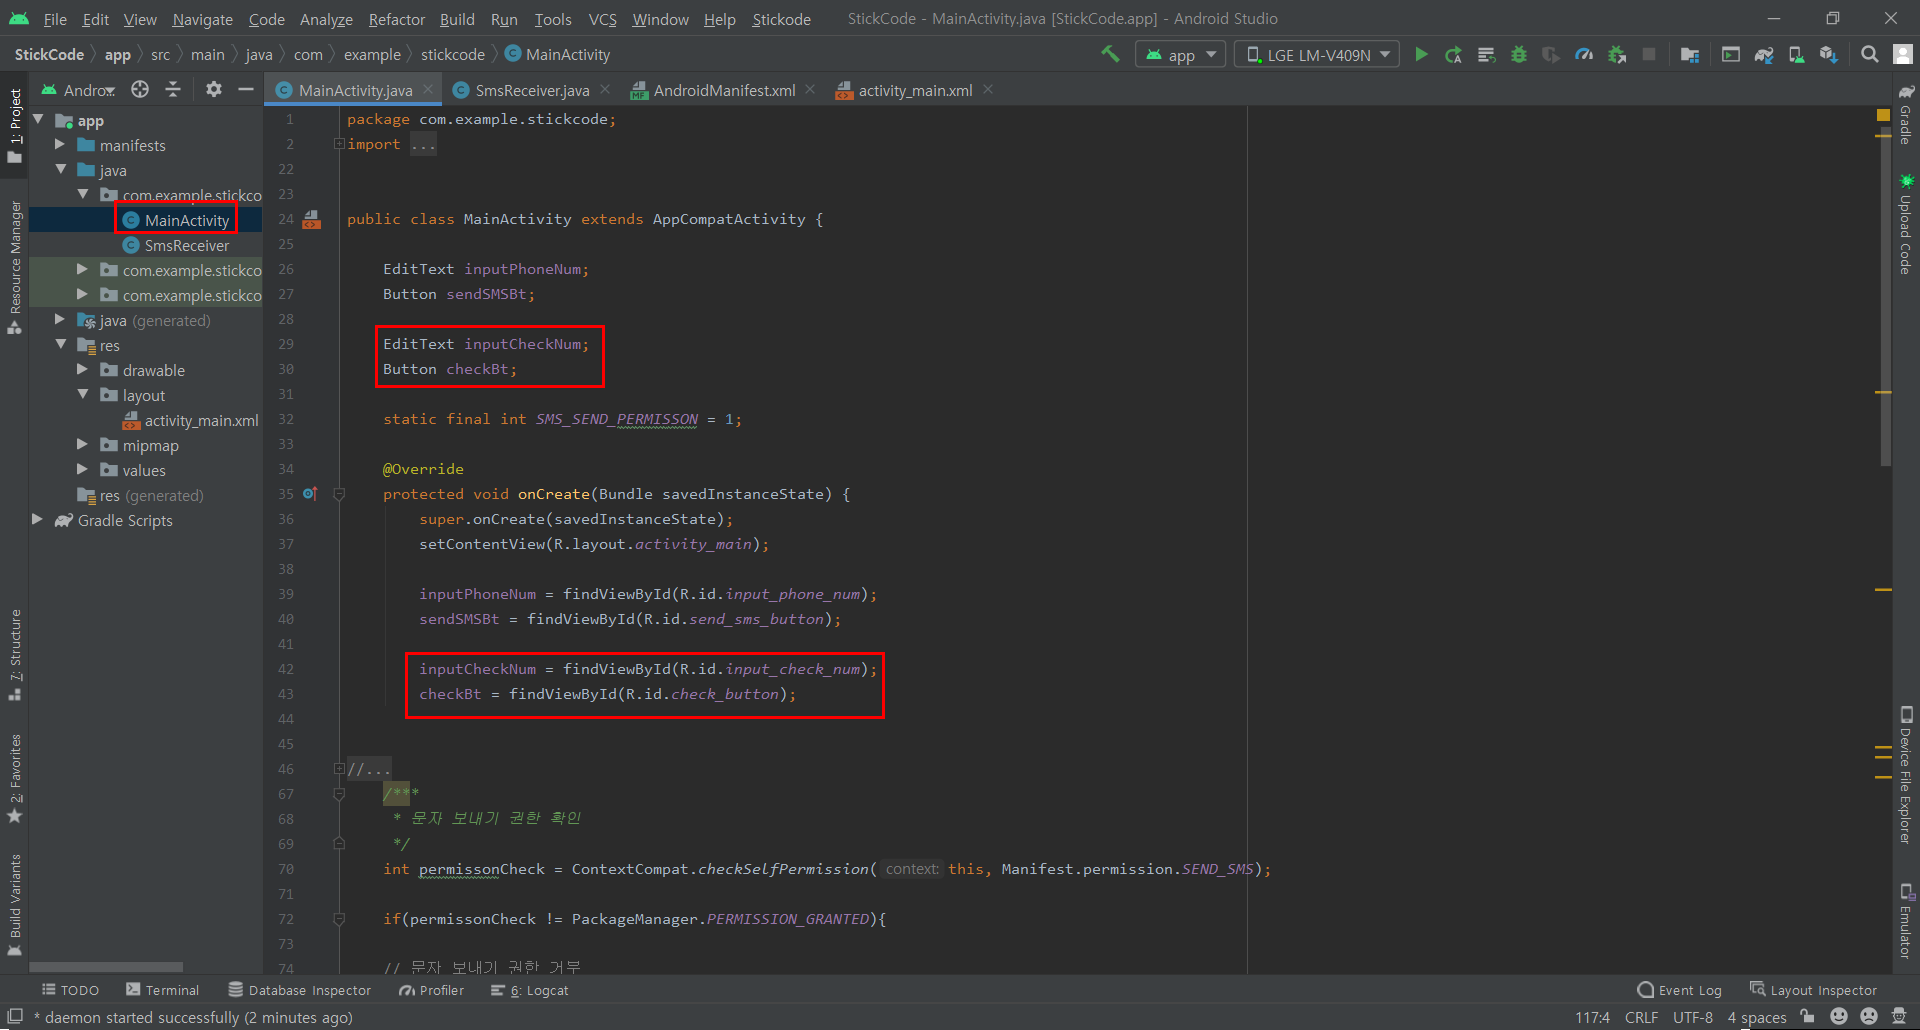
▶ MainActivity에 위에서 추가해준 인증번호 인풋창과 확인 버튼을 작성해줍니다.
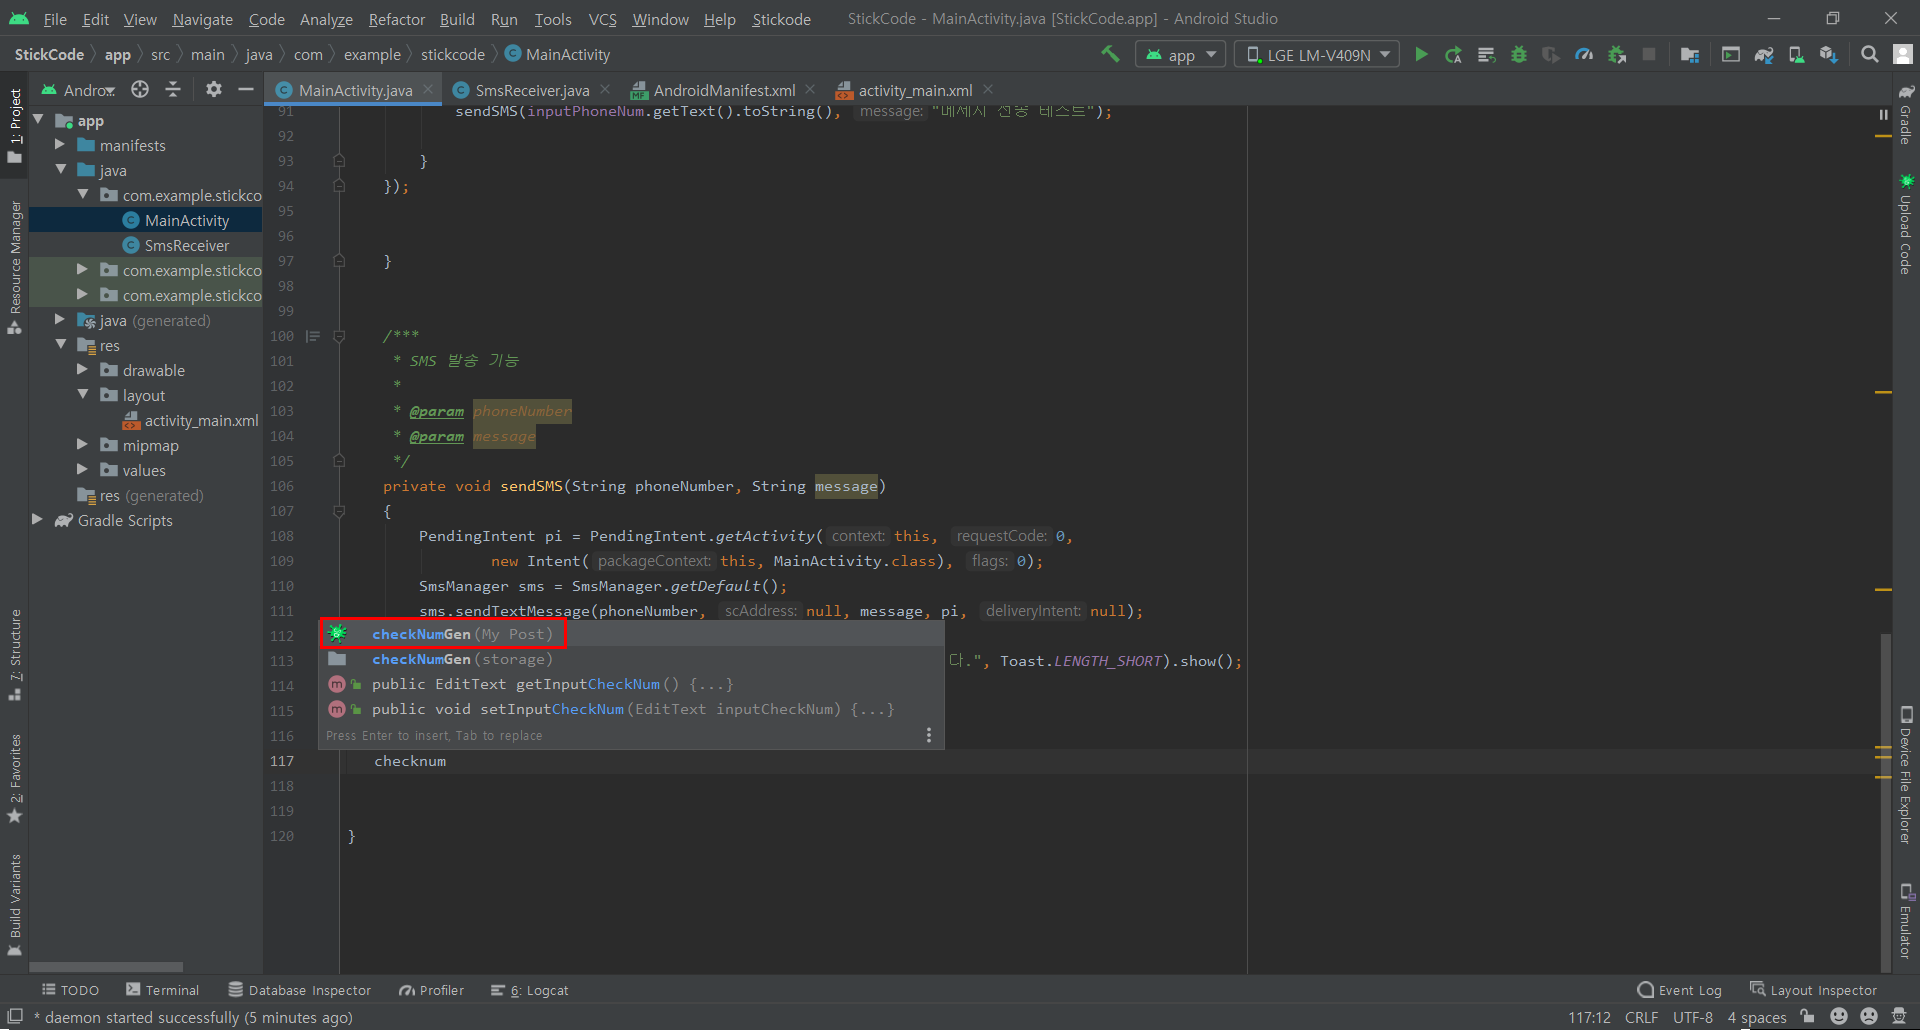
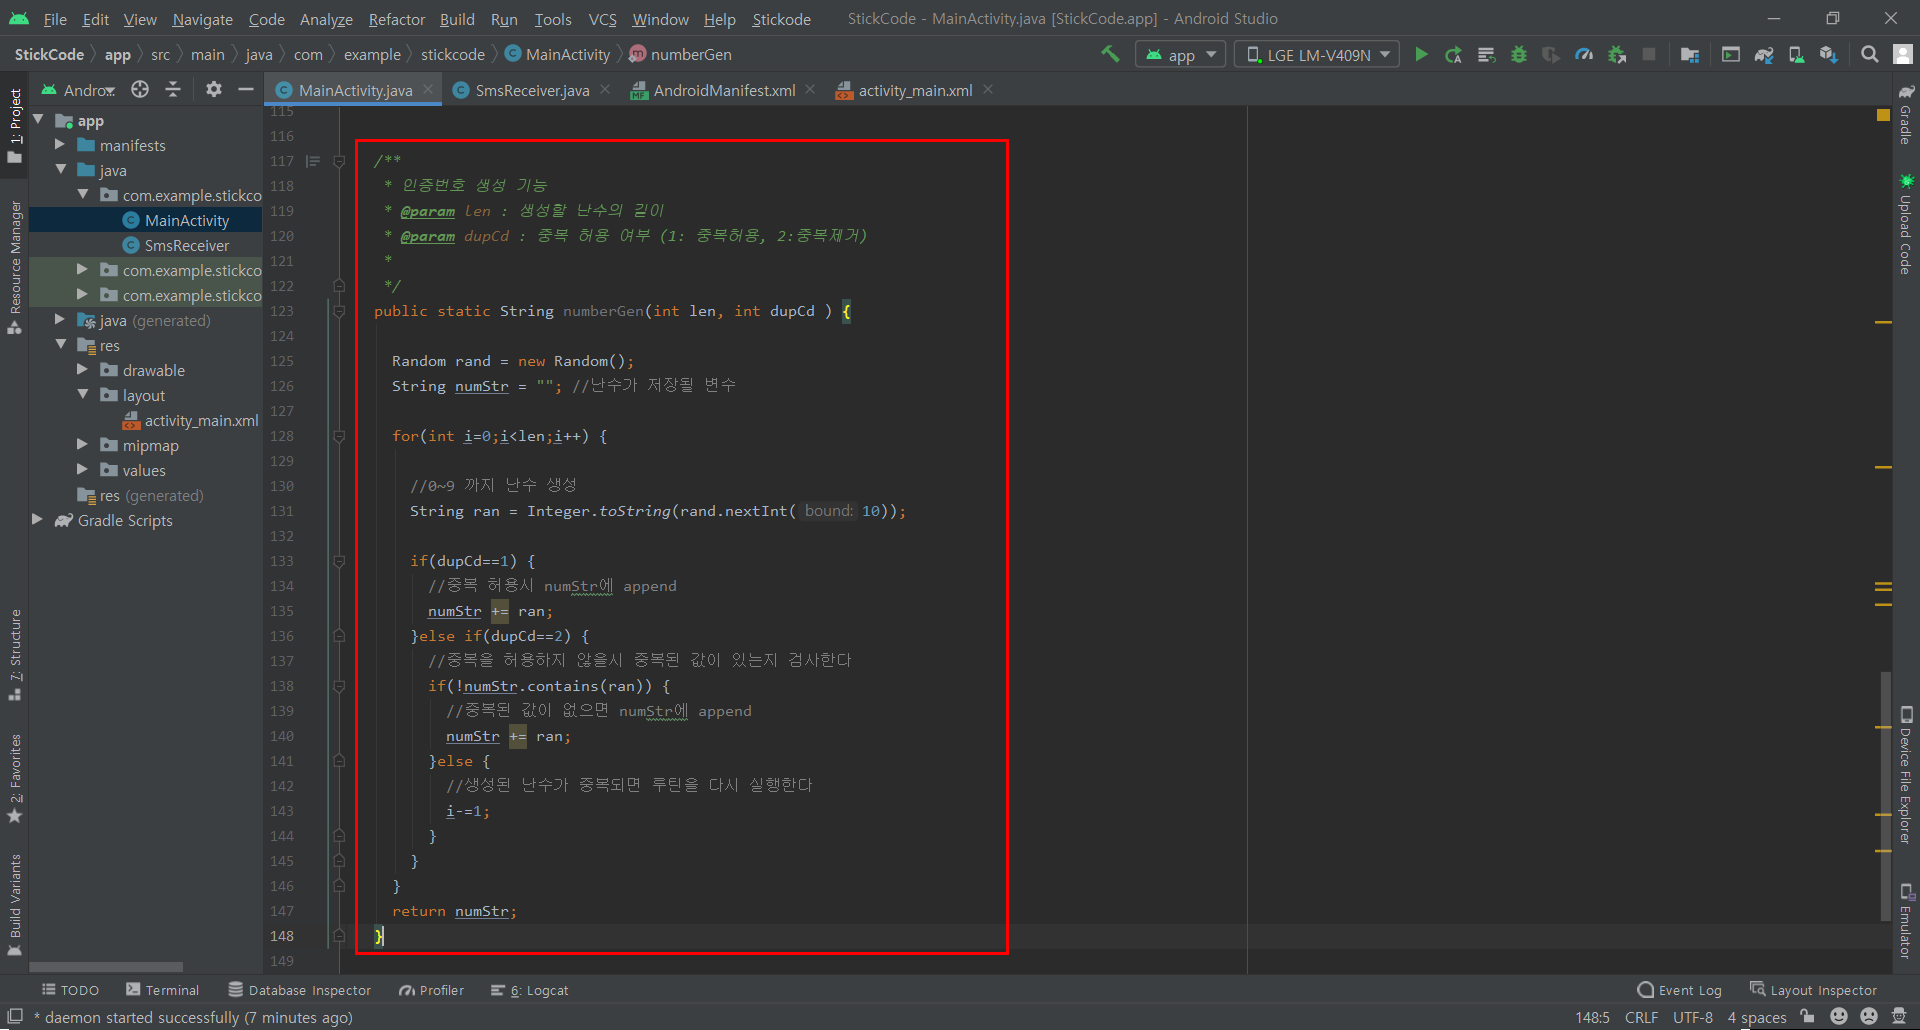
▶ SMS에 첨부할 인증번호를 생성하는 기능을 스틱코드에서 불러와 추가해줍니다.

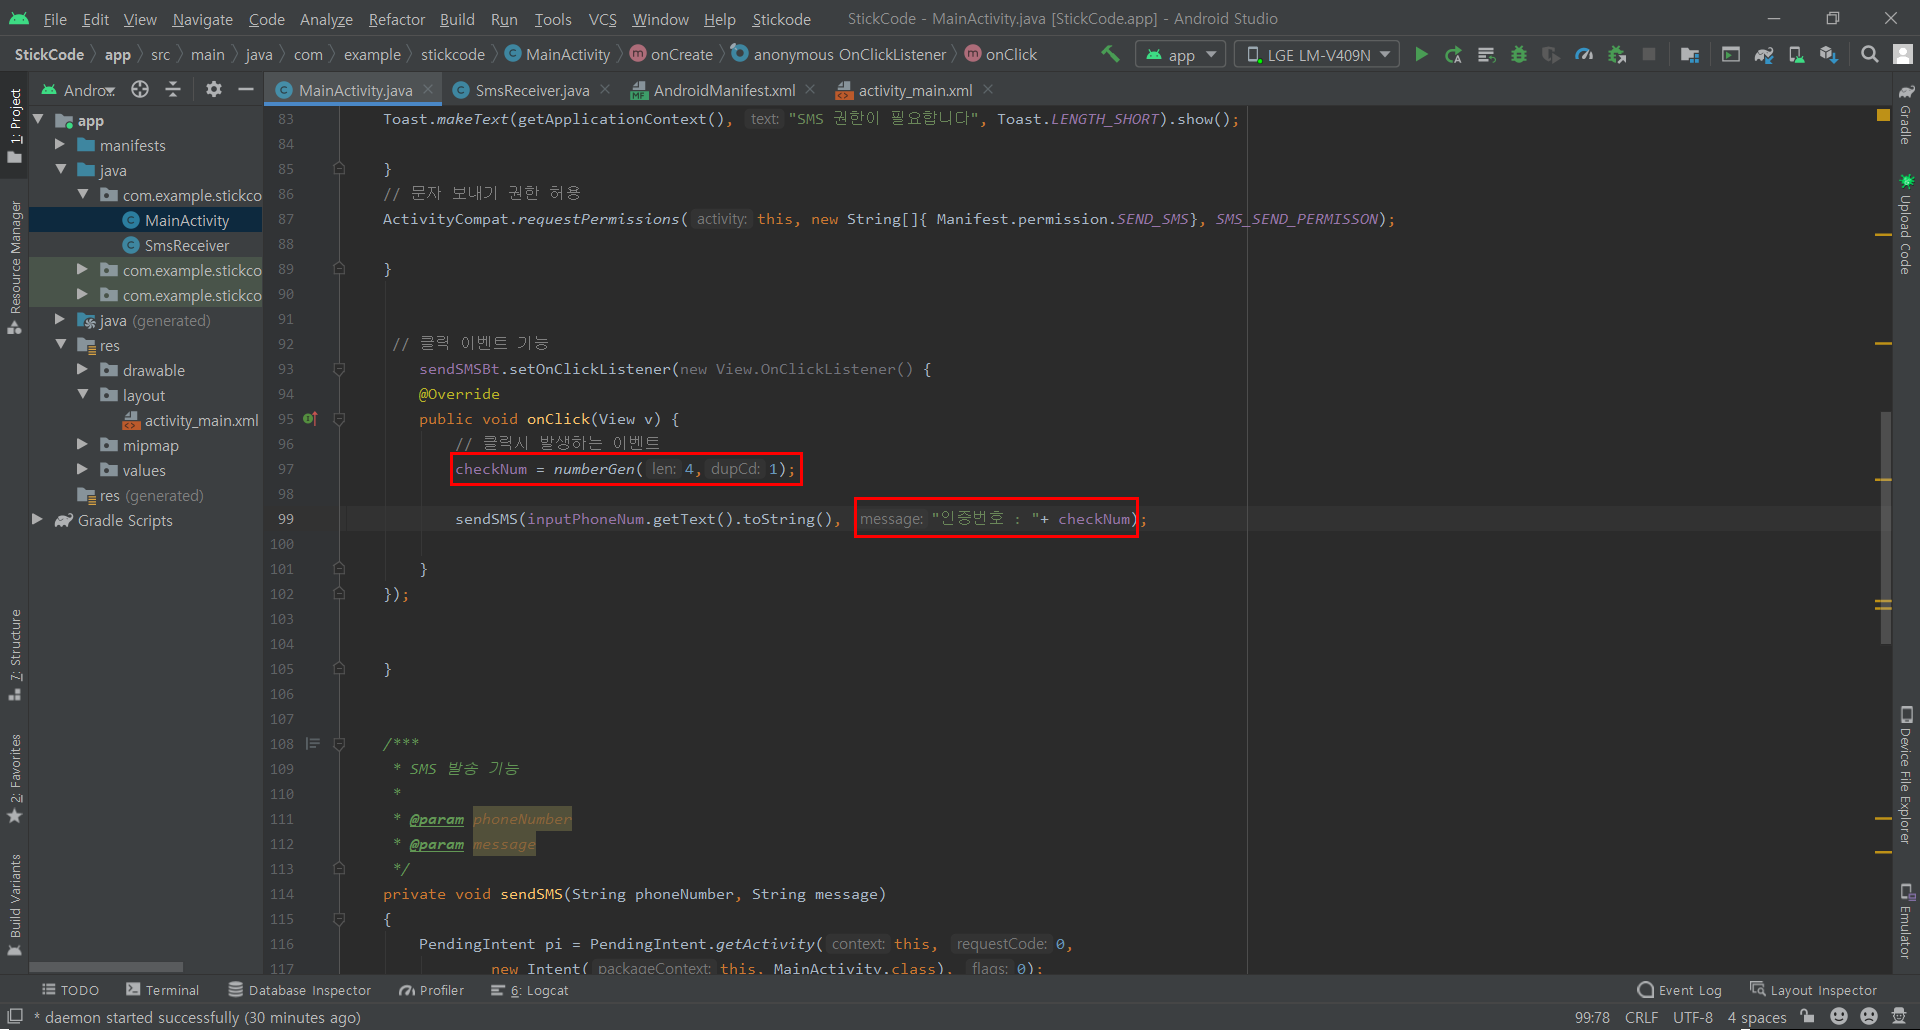
▶ 생성한 인증번호를 담을 변수를 선언 해줍니다.
▶ SMS 발송 기능에 인증번호를 첨부해서 보내야 하기때문에 인증번호를 메세지에 추가해 줍니다.
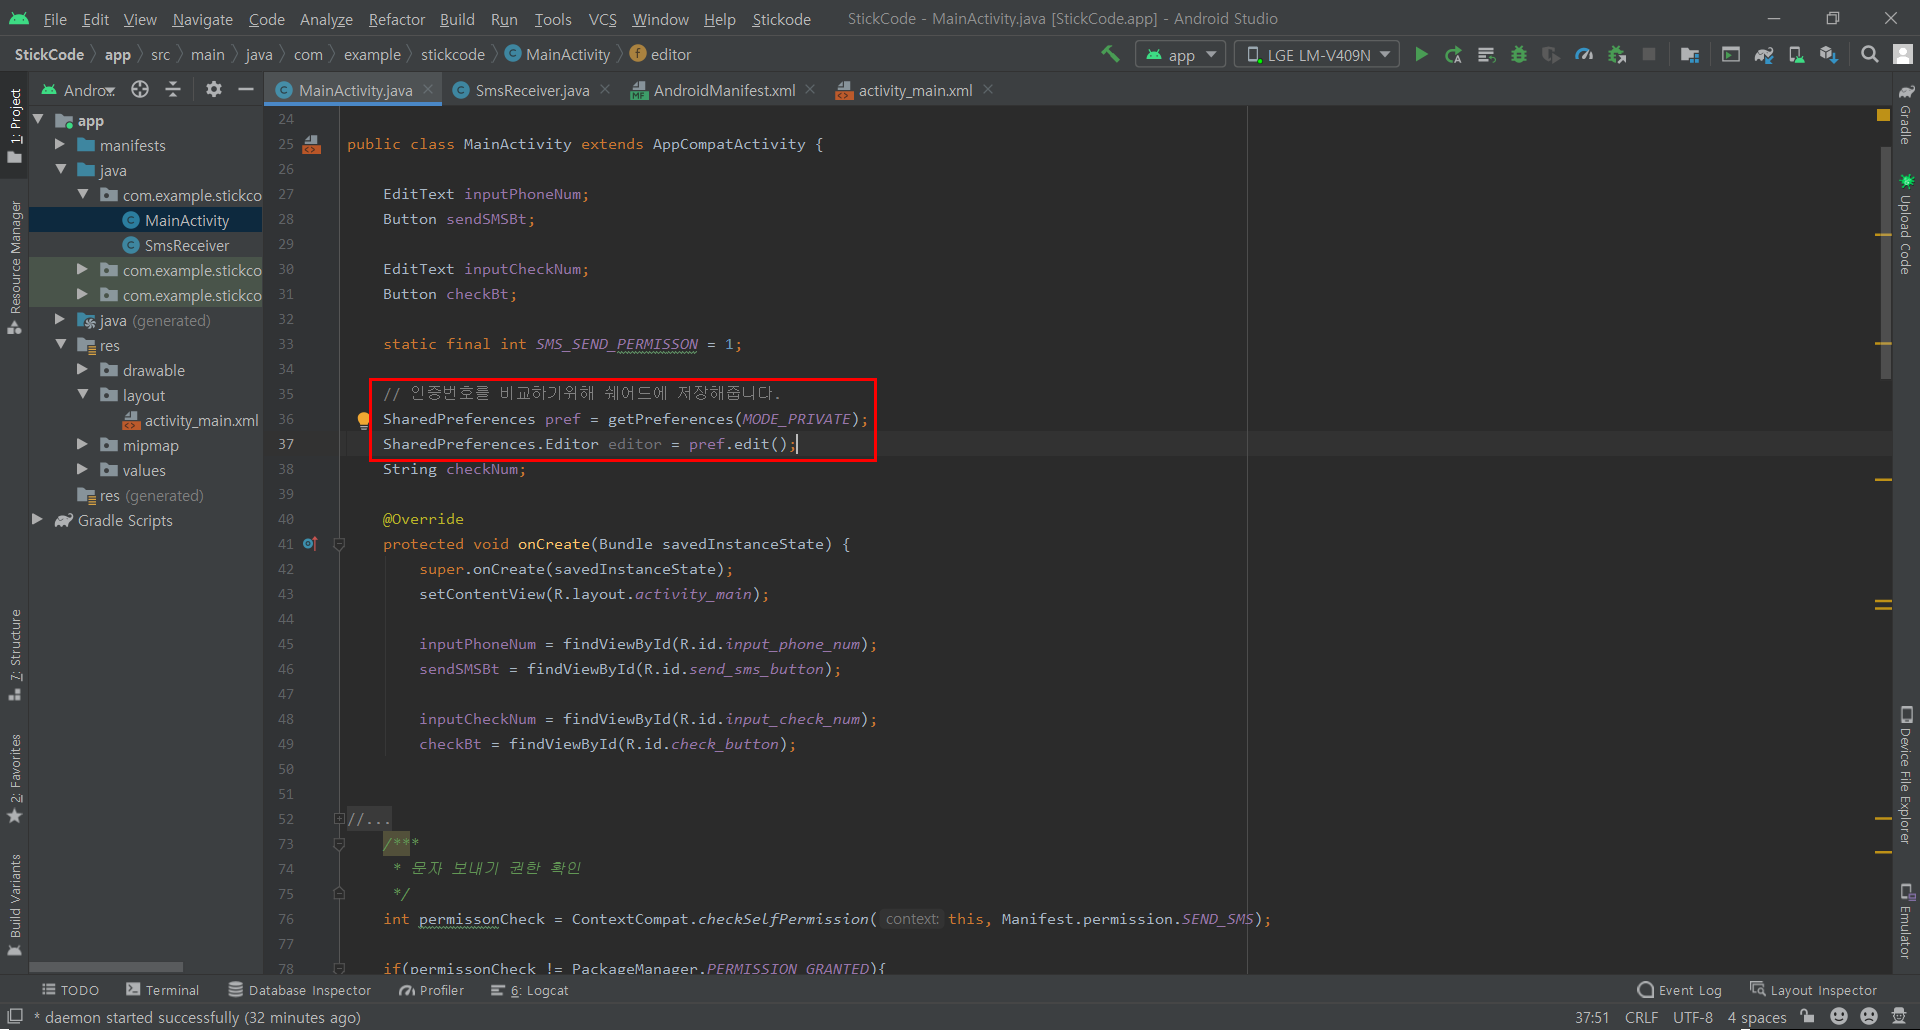

▶ 원래는 DB를 이용해야하지만 제 폰에서 간단하게 기능을 테스트 하기때문에 쉐어드를 사용했습니다.

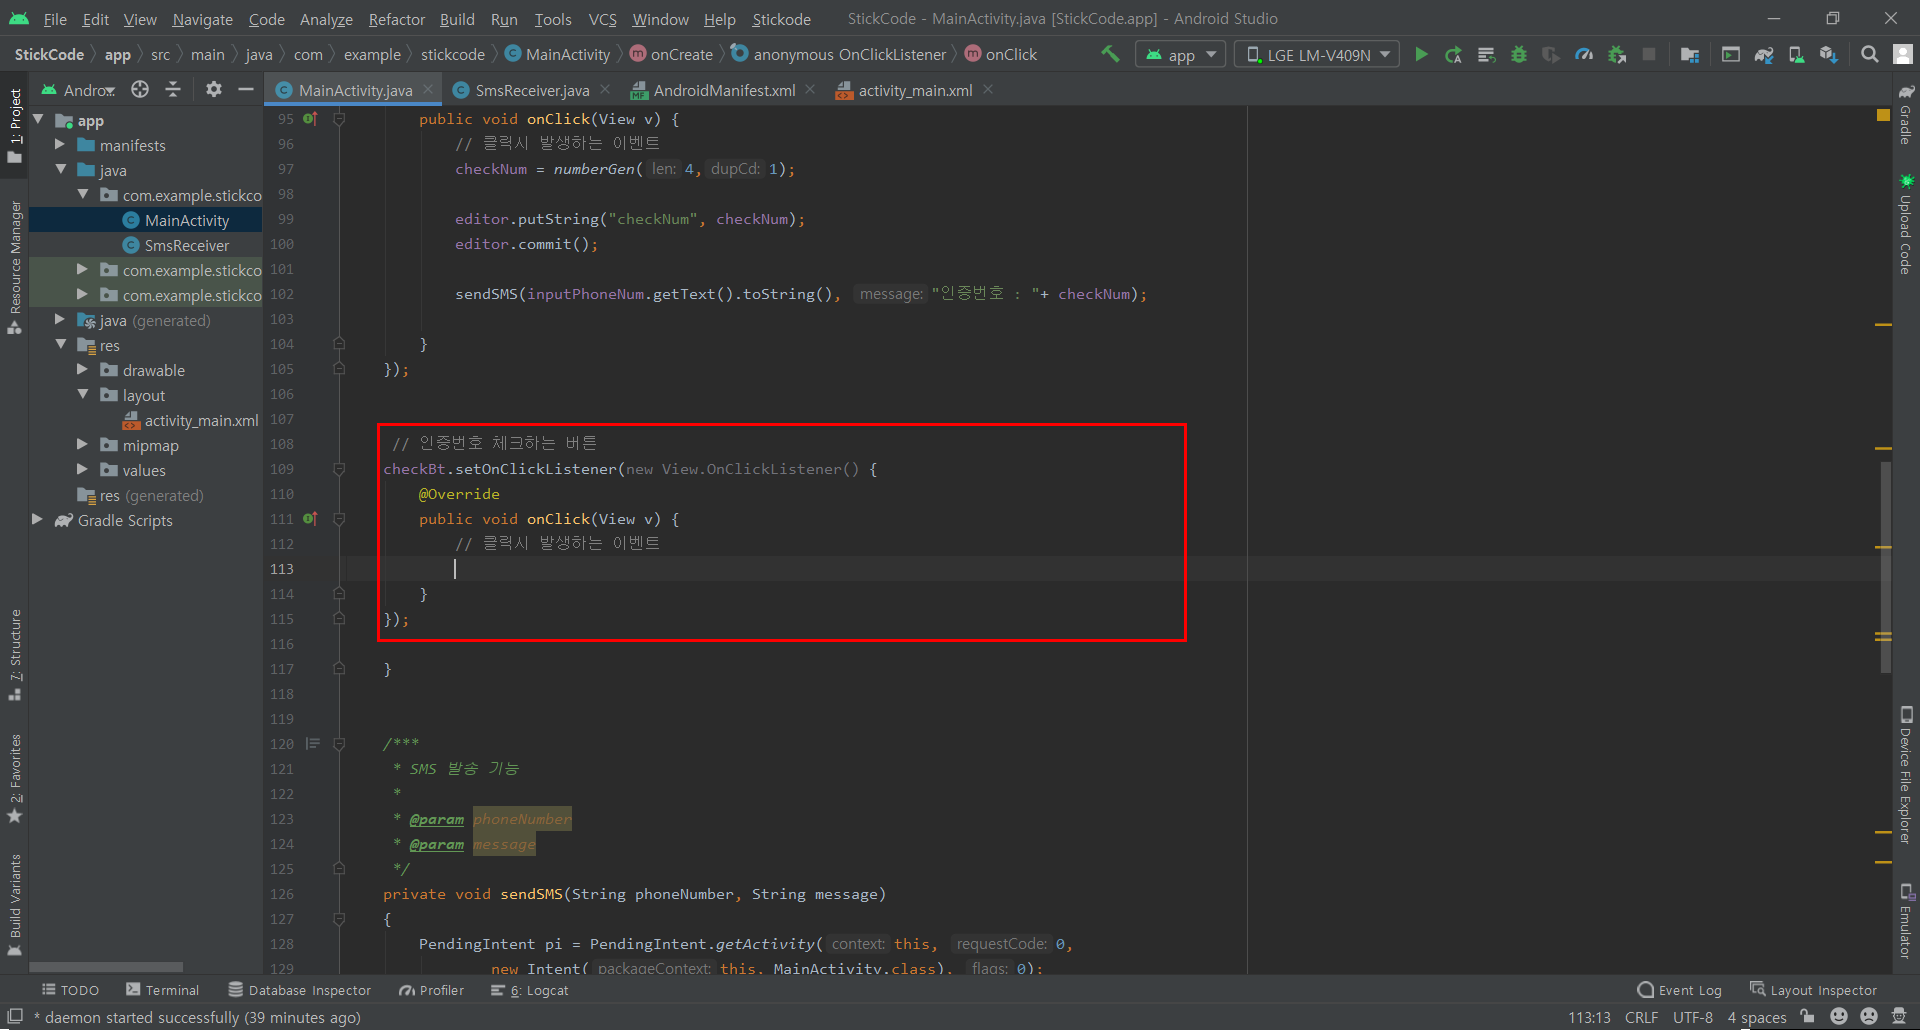
▶ 인증번호를 체크하는 버튼을 눌렀을때 인증번호가 일치하는지 체크하기위해 클릭 이벤트를 넣어줍니다.
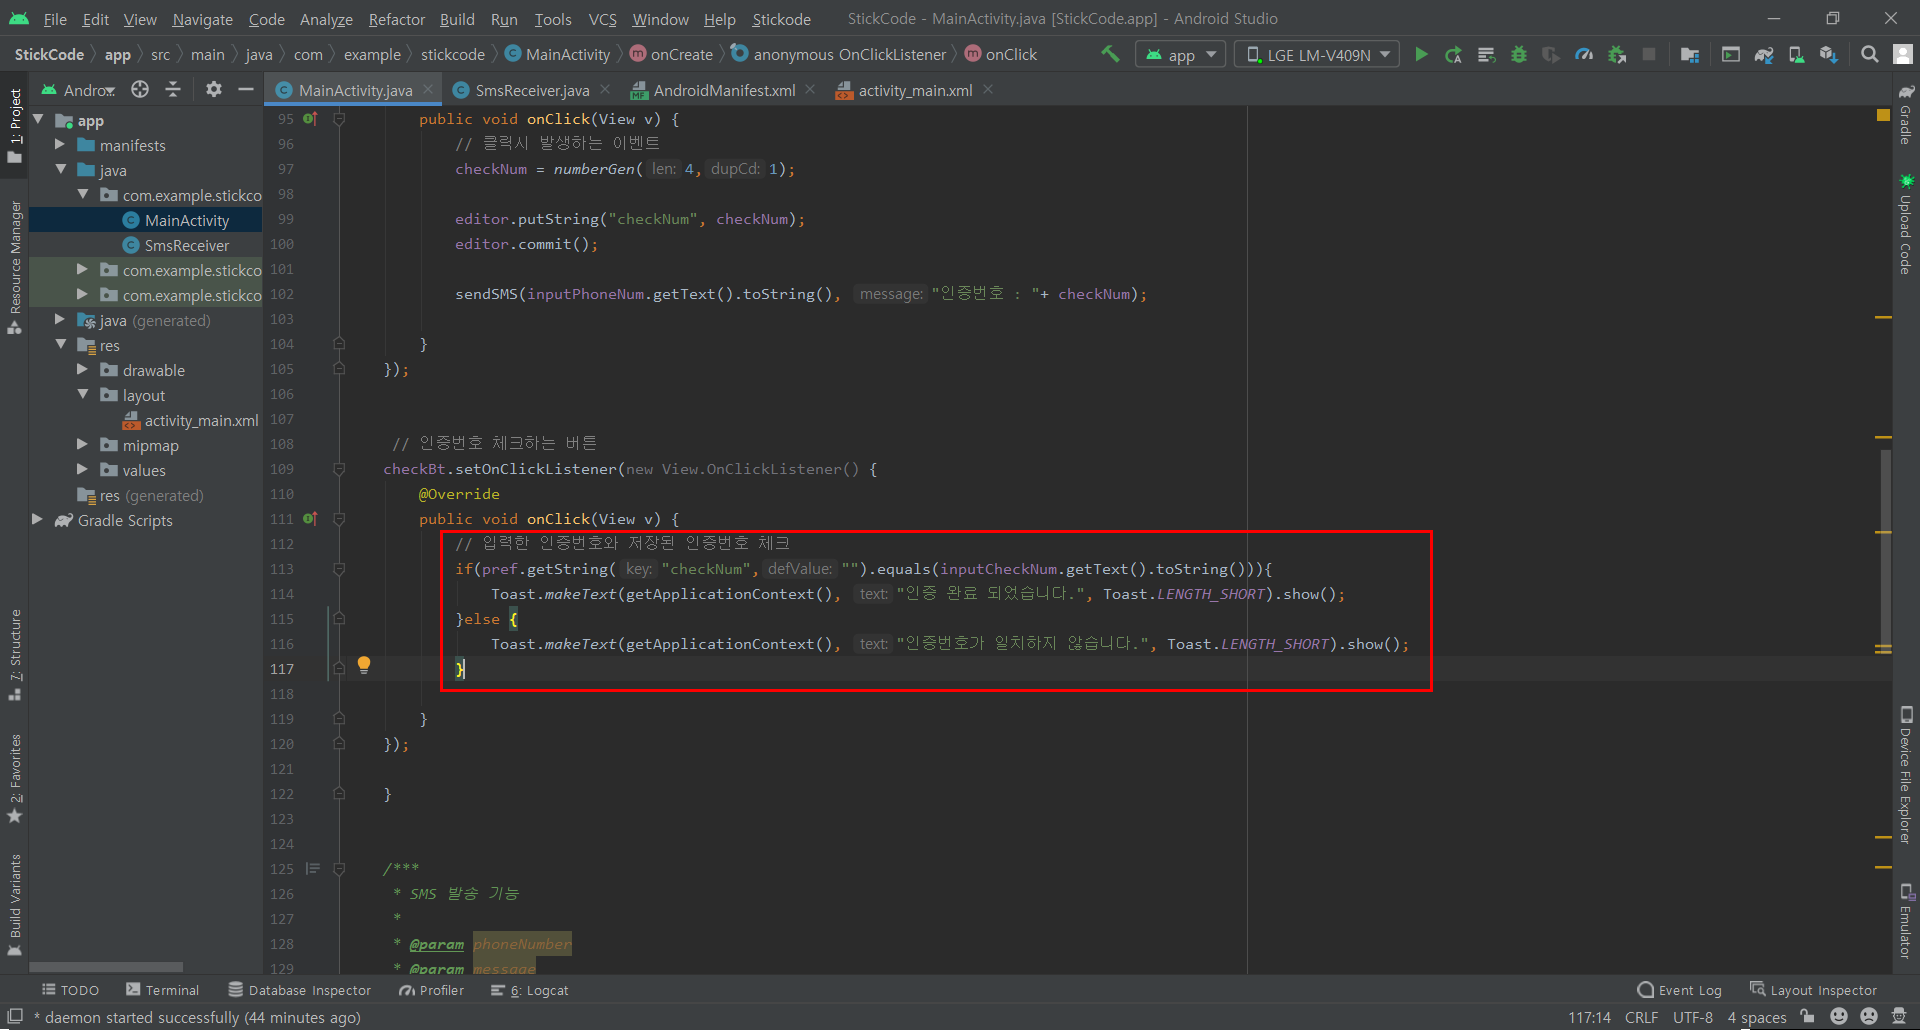
▶ 저장된 인증번호와 입력한 인증번호를 체크한 결과값을 토스트메세지를 이용해 띄워줍니다.
3. 테스트
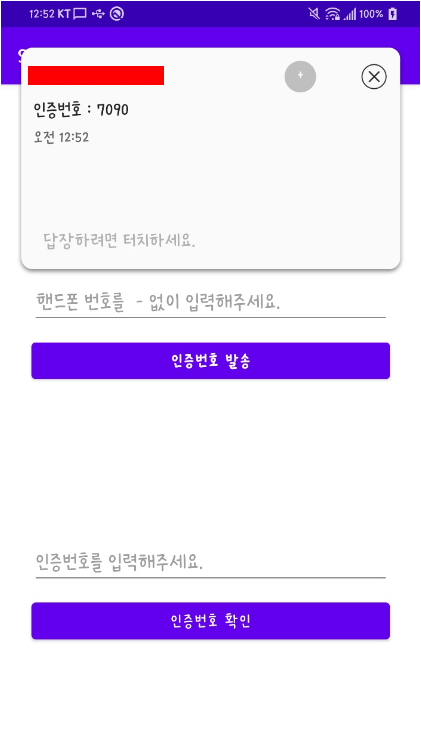
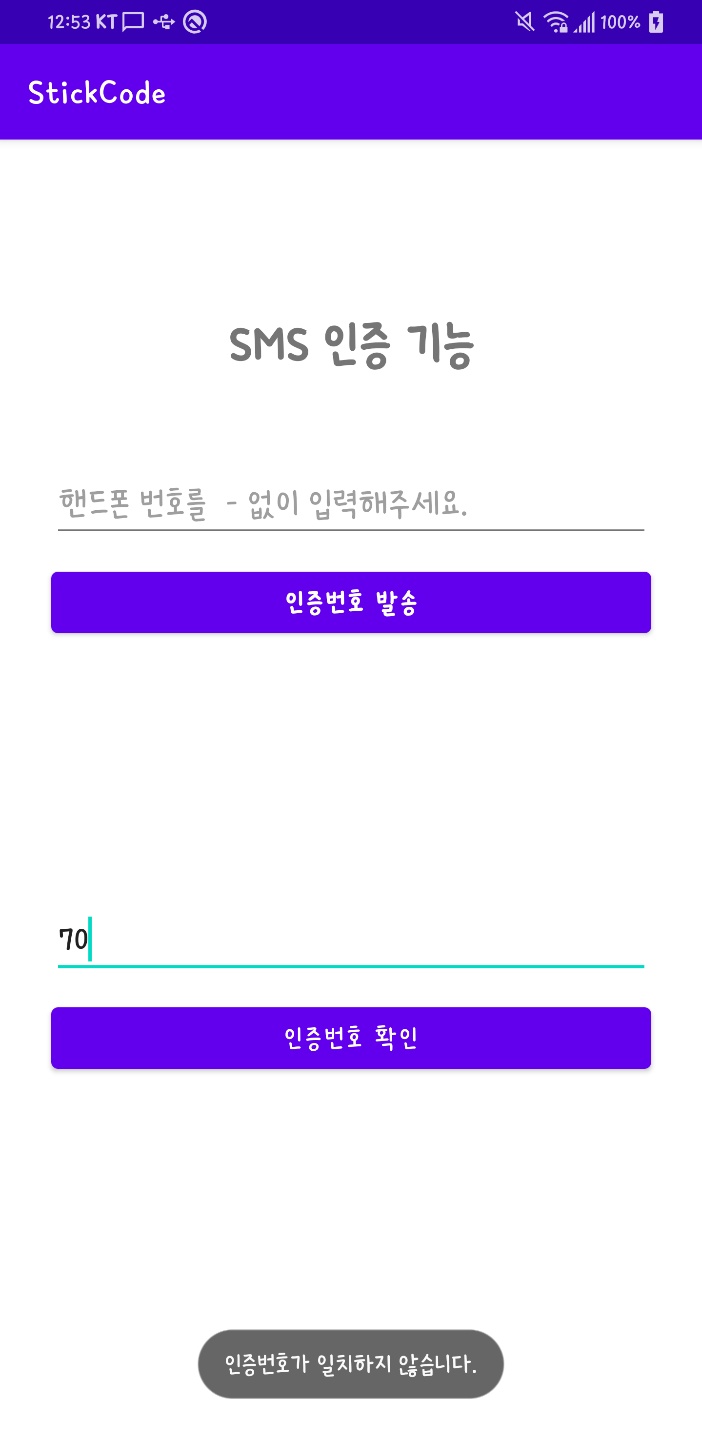
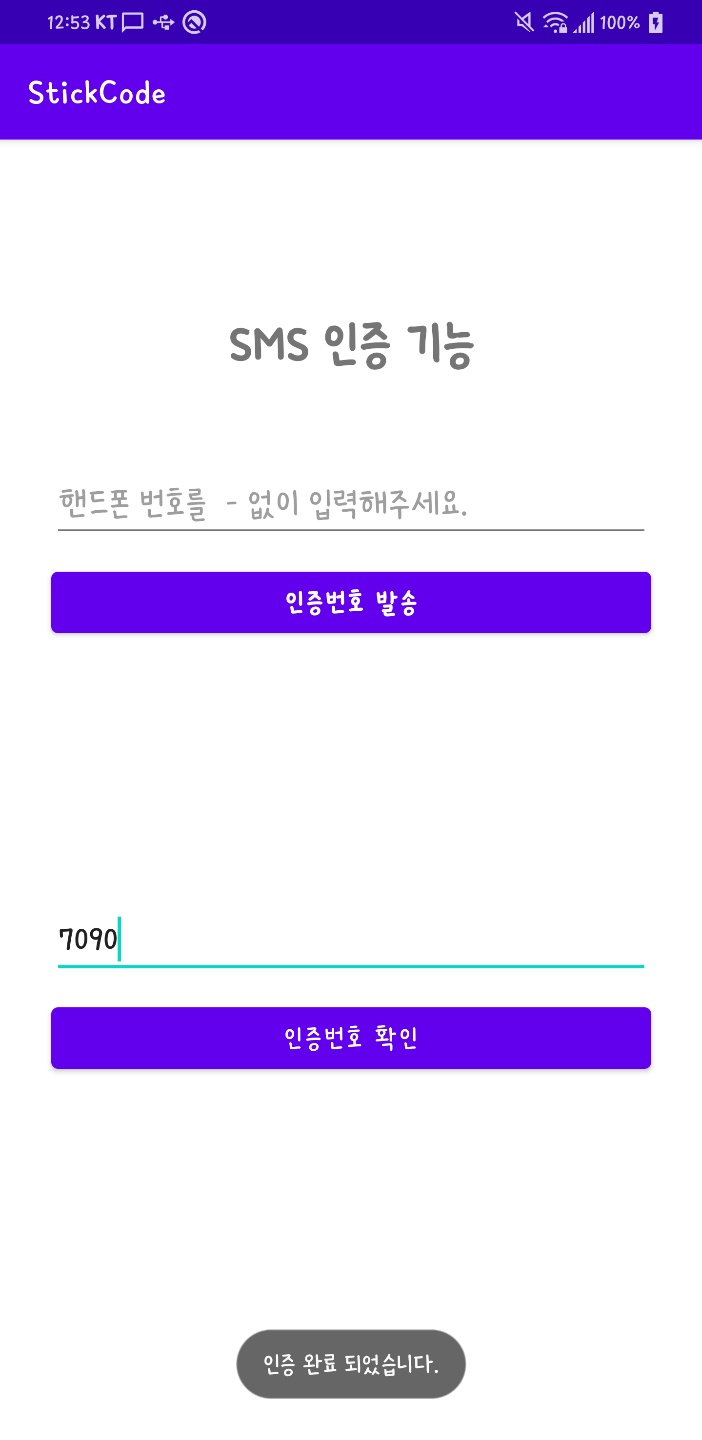
정상적으로 잘 동작하는걸 확인할 수 있습니다 : )
다음에는 다른 주제로 찾아뵙겠습니다.
'안드로이드 자바' 카테고리의 다른 글
| [Java][Android]Splash Activity 만들기(+애니메이션) (0) | 2021.03.18 |
|---|---|
| [Java][Android] 안드로이드 - 스낵바(snackbar) (0) | 2021.03.17 |
| [Java][Android] SMS 발송 기능 만들기 (9) | 2021.03.14 |
| [Java][Android] retrofit2 사용법 (2) | 2021.03.12 |
| [Java][Android] 리사이클러뷰 만들기 (1) | 2021.03.11 |


