안녕하세요. 이번 시간에는 Navigation Component로 Fragment간 화면을 전환할 때 Fragment의 애니메이션을 적용해보도록 하겠습니다.
Navigation Component란?
Navigation Component를 알기 전에 안드로이드에서 언급하는 Navigation의 뜻을 살펴보면 아래와 같습니다.
Navigation refers to the interactions that allow users to navigate across, into, and back out from the different pieces of content within your app. _ (공식 홈페이지)
큰 의미로 Navigation이란, 사용자가 앱과 상호작용하는 것을 의미합니다. 좀 더 구체적으로 살펴보면 화면 이동하며 앱을 탐색하는 과정을 Navigation이라고 합니다. 안드로이드는 Jetpack에서 Navigation Component 라이브러리를 제공하여 사용자가 앱을 탐색(Navigation)하는데 도움을 줍니다.
또한 Navigation Component에는 기본 애니메이션이 이미 존재합니다.
과정은 아래 단계를 따릅니다.
1. Navigation editor를 실행시켜 action(화살표)를 클릭하면 Animation 속성을 변경할 수 있는 패널을 확인할 수 있습니다.

2. Animation 을 추가할 수 있는 타입은 아래 4가지가 있습니다.
1) 화면(Destination) 입장
2) 화면(Destination) 퇴장
3) 팝업 액션으로 화면(Destination) 입장 하는 경우
4) 팝업 액션으로 화면(Destination) 퇴장 하는 경우
3. 우측 항목에서 애니메이션을 선택해주면 됩니다.
애니메이션을 넣고 화면(destination) 안에 있는 요소를 보시면 아마 아래와 같이 추가 될 겁니다.
<fragment
    android:id="@+id/specifyAmountFragment"
    android:name="com.example.buybuddy.buybuddy.SpecifyAmountFragment"
    android:label="fragment_specify_amount"
    tools:layout="@layout/fragment_specify_amount">
    <action
        android:id="@+id/confirmationAction"
        app:destination="@id/confirmationFragment"
        app:enterAnim="@anim/slide_in_right"
        app:exitAnim="@anim/slide_out_left"
        app:popEnterAnim="@anim/slide_in_left"
        app:popExitAnim="@anim/slide_out_right" />
</fragment>
잠깐, 아직 Navigation 라이브러리를 사용하기 위한 기본 세팅이 안되어 있다면 아래 절차를 밟아주세요.
첫번 째로 아래 의존성을 추가해주도록 합시다.
def nav_version = "2.3.0"

// Java language implementation
implementation "androidx.navigation:navigation-fragment:$nav_version"
implementation "androidx.navigation:navigation-ui:$nav_version"

// Kotlin
implementation "androidx.navigation:navigation-fragment-ktx:$nav_version"
implementation "androidx.navigation:navigation-ui-ktx:$nav_version"

// Feature module Support
implementation "androidx.navigation:navigation-dynamic-features-fragment:$nav_version"

// Testing Navigation
androidTestImplementation "androidx.navigation:navigation-testing:$nav_version"
메인 액티비티에는 프래그먼트가 띄워줄 공간, 즉 컨테이너를 만들어줘야하는데 아래처럼 작성해주면 됩니다.
<?xml version="1.0" encoding="utf-8"?>
<androidx.constraintlayout.widget.ConstraintLayout xmlns:android="http://schemas.android.com/apk/res/android"
    xmlns:app="http://schemas.android.com/apk/res-auto"
    xmlns:tools="http://schemas.android.com/tools"
    android:layout_width="match_parent"
    android:layout_height="match_parent"
    tools:context=".MainActivity">

   <androidx.fragment.app.FragmentContainerView
       android:id="@+id/nav_host_fragment_container"
       android:name="androidx.navigation.fragment.NavHostFragment"
       android:layout_width="0dp"
       android:layout_height="0dp"
       app:layout_constraintTop_toTopOf="parent"
       app:layout_constraintStart_toStartOf="parent"
       app:layout_constraintEnd_toEndOf="parent"
       app:layout_constraintBottom_toBottomOf="parent"
       app:defaultNavHost ="true"
       app:navGraph ="@navigation/nav_graph"/>

</androidx.constraintlayout.widget.ConstraintLayout>
자 그럼 화면 전환간 애니메이션을 만들어 보도록 하겠습니다.
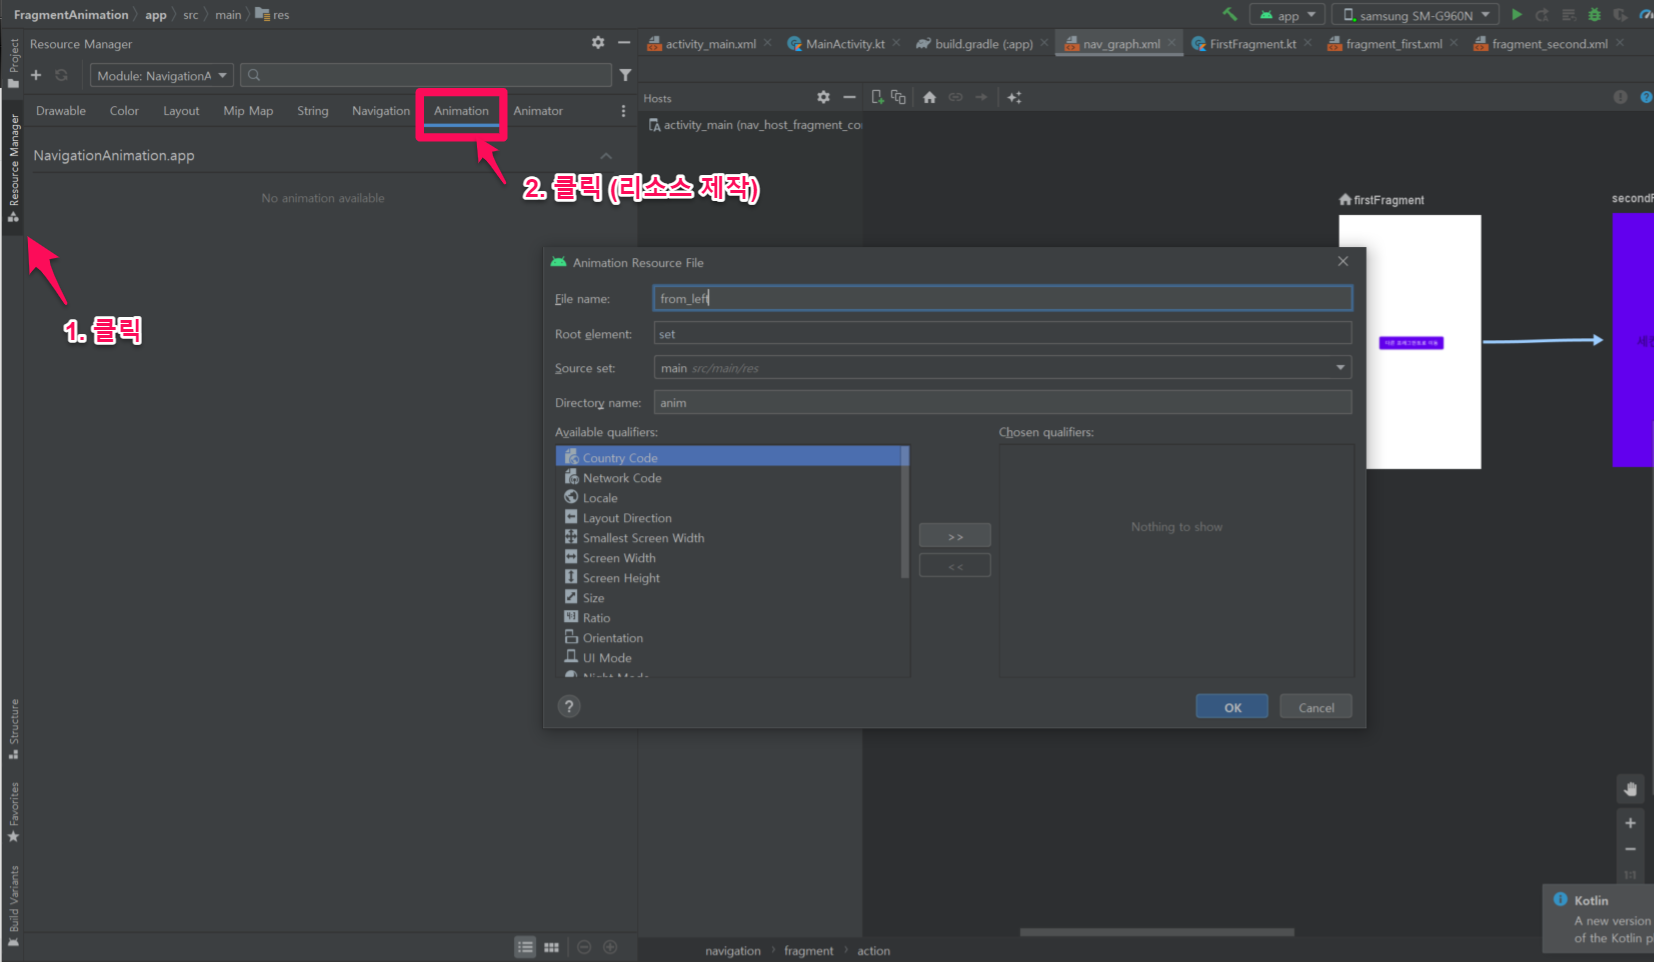
화면이 왼쪽으로 사라지는 것과 오른쪽에서 생성되는 것을 만들어 보겠습니다.
왼쪽으로 사라지는 것. (to_left.xml)
<?xml version="1.0" encoding="utf-8"?>
<set xmlns:android="http://schemas.android.com/apk/res/android">
    <translate
        android:duration="300"
        android:fromXDelta="0%"
        android:toXDelta="-100%" />
</set>
오른쪽에서 생성되는 것. (from_right.xml)
<?xml version="1.0" encoding="utf-8"?>
<set xmlns:android="http://schemas.android.com/apk/res/android">
    <translate
        android:duration="300"
        android:fromXDelta="100%"
        android:toXDelta="0%" />

</set>
이 리소스 파일들을 action animation에 추가해주면 됩니다.
결과물입니다.

'안드로이드 코틀린' 카테고리의 다른 글
| [Kotlin][Android] Bottom Sheet Dialog (0) | 2022.03.16 |
|---|---|
| [Kotlin][Android] 글씨가 흐르는 텍스트뷰 만들기 (0) | 2022.03.11 |
| [Kotlin][Android] Flexbox Layout 사용해보기 (0) | 2022.03.08 |
| [Kotlin][Android] 리사이클러뷰 안에 뷰페이저 넣기 (0) | 2022.03.07 |
| [Kotlin][Android] 간단한 중첩 리사이클러뷰 만들기 (0) | 2022.02.27 |

