[Java][Android] MLkit를 이용한 얼굴 탐지
이번 예제에서는 구글에서 제공하는 MLkit(머신러닝 키트)를 이용해서 얼굴 탐지를 해보도록 하겠습니다.
MLkit를 통해 구글이 만들어놓은 머신러닝 모델을 가져와 쉽고 빠르게 머신러닝 기술을 앱에 적용할 수 있습니다.
얼굴탐지 말고도 글자인식, 랜드마크 인식, 번역 등 여러 종류의 모델이 있으니 참고해보시면 좋을 것 같습니다.
ML Kit | Google Developers
Machine learning for mobile developers
developers.google.com
MLkit Face detection 사용법
1. 의존성 추가
 dependencies {
      // ...
      // Use this dependency to bundle the model with your app
      implementation 'com.google.mlkit:face-detection:16.0.7'
 }
2. face detector 옵션 설정하기
face detector 모델에 적용할 수 있는 여러 옵션이 있는데 자신에게 맞는 옵션을 선택해주면 됩니다. 옵션에 대한 자세한 내용은 공식문서를 참고해주세요.
옵션 생성 예제코드
// 높은 정확도를 가진 랜드마크 탐지와 얼굴 분류를 위한 설정
FaceDetectorOptions highAccuracyOpts =
        new FaceDetectorOptions.Builder()
                .setPerformanceMode(FaceDetectorOptions.PERFORMANCE_MODE_ACCURATE)
                .setLandmarkMode(FaceDetectorOptions.LANDMARK_MODE_ALL)
                .setClassificationMode(FaceDetectorOptions.CLASSIFICATION_MODE_ALL)
                .build();

// 실시간 contour 탐지를 위한 설정
FaceDetectorOptions realTimeOpts =
        new FaceDetectorOptions.Builder()
                .setContourMode(FaceDetectorOptions.CONTOUR_MODE_ALL)
                .build();
3. Input Image 준비하기
모델에 제공할 Input Image를 준비해야 합니다. Input Image를 생성하는 방법은 여러가지이며 그 중 비트맵을 이용해 Input Image를 생성해보도록 하겠습니다. 다른 방법은 공식문서를 참고해주세요.
비트맵을 이용한 Input Image 생성 예제 코드
InputImage image = InputImage.fromBitmap(bitmap, rotationDegree);
4. FaceDetector 객체 가져오기
detector 객체를 생성합니다. 2번과정에서 생성해준 옵션을 인자로 넣어줍니다. 아무 옵션은 지정해주지 않으면 기본 설정값으로 세팅됩니다.
FaceDetector detector = FaceDetection.getClient(options);
// Or use the default options:
// FaceDetector detector = FaceDetection.getClient();
5. 이미지 처리하기
생성한 detector 객체를 이용해 3번 과정에서 생성한 Input Image를 처리해주는 코드입니다. 탐지한 결과는 result에 담기게 됩니다.
Task<List<Face>> result =
        detector.process(image)
                .addOnSuccessListener(
                        new OnSuccessListener<List<Face>>() {
                            @Override
                            public void onSuccess(List<Face> faces) {
                                // Task completed successfully
                                // ...
                            }
                        })
                .addOnFailureListener(
                        new OnFailureListener() {
                            @Override
                            public void onFailure(@NonNull Exception e) {
                                // Task failed with an exception
                                // ...
                            }
                        });
예제 작성
위에서 구글 face detection mlkit를 사용하는 방법에 대해 알아보았습니다. 다음으로 실제로 어떤 식으로 사용할 수 있는지 예제를 통해 알아보겠습니다.
1. 레이아웃 작성
<?xml version="1.0" encoding="utf-8"?>
<androidx.constraintlayout.widget.ConstraintLayout xmlns:android="http://schemas.android.com/apk/res/android"
    xmlns:app="http://schemas.android.com/apk/res-auto"
    xmlns:tools="http://schemas.android.com/tools"
    android:layout_width="match_parent"
    android:layout_height="match_parent"
    tools:context=".FaceDetectionActivity">


    <ImageView
        android:id="@+id/imageView"
        android:layout_width="200dp"
        android:layout_height="200dp"
        android:layout_marginTop="248dp"
        app:layout_constraintEnd_toEndOf="parent"
        app:layout_constraintHorizontal_bias="0.495"
        app:layout_constraintStart_toStartOf="parent"
        app:layout_constraintTop_toTopOf="parent"
        tools:src="@tools:sample/avatars" />

    <Button
        android:id="@+id/btn_get_image"
        android:layout_width="0dp"
        android:layout_height="wrap_content"
        android:layout_marginTop="16dp"
        android:text="Get Image"
        app:layout_constraintEnd_toEndOf="@+id/btn_detection_image"
        app:layout_constraintStart_toStartOf="@+id/btn_detection_image"
        app:layout_constraintTop_toBottomOf="@+id/imageView" />

    <Button
        android:id="@+id/btn_detection_image"
        android:layout_width="wrap_content"
        android:layout_height="wrap_content"
        android:layout_marginTop="16dp"
        android:text="Detection Image"
        app:layout_constraintEnd_toEndOf="parent"
        app:layout_constraintStart_toStartOf="parent"
        app:layout_constraintTop_toBottomOf="@+id/btn_get_image" />

    <TextView
        android:id="@+id/textView7"
        android:layout_width="wrap_content"
        android:layout_height="wrap_content"
        android:layout_marginTop="32dp"
        android:text="얼굴 탐지 정보"
        app:layout_constraintEnd_toEndOf="parent"
        app:layout_constraintStart_toStartOf="parent"
        app:layout_constraintTop_toTopOf="parent" />

    <ScrollView
        android:layout_width="match_parent"
        android:layout_height="150dp"
        app:layout_constraintBottom_toTopOf="@+id/imageView"
        app:layout_constraintEnd_toEndOf="parent"
        app:layout_constraintHorizontal_bias="0.0"
        app:layout_constraintStart_toStartOf="parent"
        app:layout_constraintTop_toBottomOf="@+id/textView7"
        app:layout_constraintVertical_bias="0.17">

        <TextView
            android:id="@+id/face_info"
            android:layout_width="match_parent"
            android:layout_height="wrap_content"
            android:layout_marginTop="12dp"
            android:text=""
            app:layout_constraintEnd_toEndOf="parent"
            app:layout_constraintHorizontal_bias="0.498"
            app:layout_constraintStart_toStartOf="parent"
            app:layout_constraintTop_toBottomOf="@+id/textView7" />

    </ScrollView>


</androidx.constraintlayout.widget.ConstraintLayout>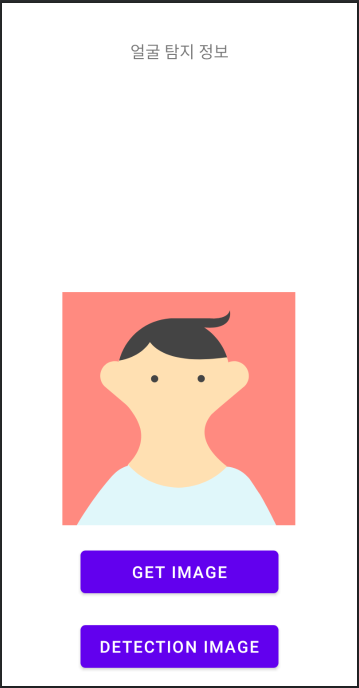
예제에 필요한 레이아웃을 작성해줍니다. GET IMAGE 버튼을 통해 갤러리에 있는 얼굴 사진을 불러옵니다. 그 후 DETECTION IMAGE 버튼을 통해 가져온 사진을 탐지한 후 결과를 위에 텍스트로 보여줄 예정입니다.
2. 코드 작성
이제 얼굴 탐지를 위한 코드를 작성해보겠습니다.
FaceDetectionActivity.java
public class FaceDetectionActivity extends AppCompatActivity {

    static final int REQUEST_CODE = 1;
    ImageView imageView;
    Uri uri;
    Bitmap bitmap;
    Button btn_get_image, btn_detection_image;
    InputImage image;
    TextView face_info;

    @Override
    protected void onCreate(Bundle savedInstanceState) {
        super.onCreate(savedInstanceState);
        setContentView(R.layout.activity_m_p_anroid_chart);

        // High-accuracy landmark detection and face classification
        // detector에 대한 옵션 설정
        FaceDetectorOptions highAccuracyOpts =
                new FaceDetectorOptions.Builder()
                        .setPerformanceMode(FaceDetectorOptions.PERFORMANCE_MODE_ACCURATE)
                        .setLandmarkMode(FaceDetectorOptions.LANDMARK_MODE_ALL)
                        .setClassificationMode(FaceDetectorOptions.CLASSIFICATION_MODE_ALL)
                        .build();

        // detector생성
        FaceDetector detector = FaceDetection.getClient(highAccuracyOpts);


        imageView = findViewById(R.id.imageView);
        face_info = findViewById(R.id.face_info);

        // GET IMAGE 버튼
        btn_get_image = findViewById(R.id.btn_get_image);
        btn_get_image.setOnClickListener(new View.OnClickListener() {
            @Override
            public void onClick(View v) {
                Intent intent = new Intent(Intent.ACTION_PICK);
                intent.setType(MediaStore.Images.Media.CONTENT_TYPE);
                startActivityForResult(intent, REQUEST_CODE);
            }
        });

        // IMAGE DETECTION 버튼
        btn_detection_image = findViewById(R.id.btn_detection_image);
        btn_detection_image.setOnClickListener(new View.OnClickListener() {
            @Override
            public void onClick(View v) {
                // 생성한 Input Image를 처리한다.
                Task<List<Face>> result =
                        detector.process(image)
                                .addOnSuccessListener(
                                        new OnSuccessListener<List<Face>>() {
                                            @Override
                                            public void onSuccess(List<Face> faces) {   // 탐지가 성공할 경우
                                                // 처리한 이미지에 대한 결과(얼굴에 대한 정보)를 텍스트뷰에 띄워준다.
                                                face_info.setText(String.valueOf(faces));
                                            }
                                        })
                                .addOnFailureListener(
                                        new OnFailureListener() {
                                            @Override
                                            public void onFailure(@NonNull Exception e) { // 탐지가 실패할 경우
                                                Log.e("faces: ", "실패!");
                                            }
                                        });
            }
        });
    }


    @Override
    protected  void onActivityResult(int requestCode, int resultCode, Intent data){
        super.onActivityResult(requestCode,resultCode,data);
        if (requestCode == REQUEST_CODE) {
            // 갤러리에서 선택한 사진에 대한 uri를 가져온다.
            uri = data.getData();

            setImage(uri);
        }
    }


    // uri를 비트맵으로 변환시킨후 이미지뷰에 띄워주고 InputImage를 생성하는 메서드
    private void setImage(Uri uri) {
        try{
            InputStream in = getContentResolver().openInputStream(uri);
            bitmap = BitmapFactory.decodeStream(in);
            imageView.setImageBitmap(bitmap);

            image = InputImage.fromBitmap(bitmap, 0);
            Log.e("setImage", "이미지 to 비트맵");
        } catch (FileNotFoundException e){
            e.printStackTrace();
        }
    }
}
위 예제에서는 갤러리에서 선택한 사진에 대한 Uri를 가져오는 부분과 가져온 Uri를 비트맵으로 전환하는 부분이 추가되었습니다.
저는 Uri를 비트맵으로 전환하는 부분을 스틱코드를 통해 더 빠르게 작성해보았습니다.
stickode.com/code.html?fileno=10278 - Uri_to_Bitmap
STICKODE - 코드 등록하기
스틱코드에서 개발에 필요한 전세계의 모든 코드들을 찾아보세요! Java, Android, Kotlin, PHP 등의 수 많은 언어와 플랫폼을 지원합니다.
stickode.com

결과 영상
동영상 서비스가 종료되어 해당 콘텐츠를 재생할 수 없습니다.