안녕하세요~
오늘은 안드로이드 사이드 메뉴바를 만들어 보겠습니다.
스틱코드?
STICKODE
stickode.com
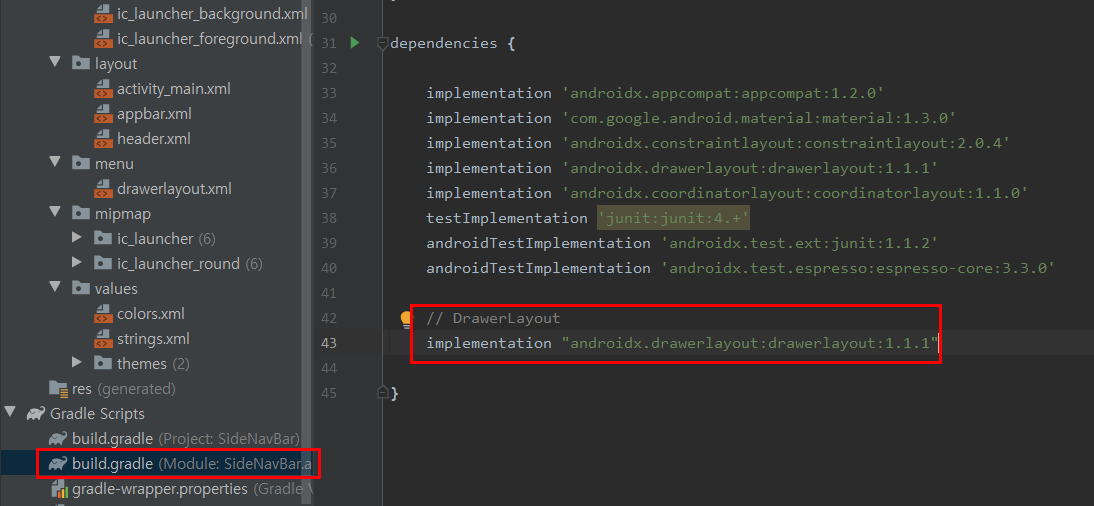
1. 라이브러리 추가
- DrawerLayout을 사용하기 위해서 gradle에 추가해줍니다.

2. 레이아웃 추가
- 사이드 메뉴바를 그리기 위한 레이아웃들을 추가해줍니다.
1) AppBar


<?xml version="1.0" encoding="utf-8"?>
<androidx.coordinatorlayout.widget.CoordinatorLayout
    xmlns:android="http://schemas.android.com/apk/res/android"
    xmlns:tools="http://schemas.android.com/tools"
    android:layout_width="match_parent"
    android:layout_height="match_parent"
    tools:context=".MainActivity">

    <com.google.android.material.appbar.AppBarLayout
        android:layout_width="match_parent"
        android:layout_height="wrap_content">

        <androidx.appcompat.widget.Toolbar
            android:id="@+id/toolbar"
            android:layout_width="match_parent"
            android:layout_height="?attr/actionBarSize"
            android:background="?attr/colorPrimary" />
    </com.google.android.material.appbar.AppBarLayout>

</androidx.coordinatorlayout.widget.CoordinatorLayout>
- 상단에 앱바를 그려줍니다.
- res > layout > appbar.xml 파일을 생성
2) SideNavBar Header


<?xml version="1.0" encoding="utf-8"?>
<LinearLayout xmlns:android="http://schemas.android.com/apk/res/android"
    xmlns:app="http://schemas.android.com/apk/res-auto"
    android:layout_width="match_parent"
    android:layout_height="200dp"
    android:background="@color/cardview_dark_background"
    android:gravity="center"
    android:orientation="vertical"
    android:theme="@style/ThemeOverlay.AppCompat.Dark">

    <TextView
        android:id="@+id/text"
        android:layout_width="wrap_content"
        android:layout_height="wrap_content"
        android:text="Side NavBar"
        android:textSize="30dp" />

</LinearLayout>
- 사이드 메뉴바의 헤더를 그려줍니다.
- res > layout > header.xml 파일을 생성
3) SideNavBar Menu


<?xml version="1.0" encoding="utf-8"?>
<menu xmlns:android="http://schemas.android.com/apk/res/android">

    <item
        android:id="@+id/menu_item1"
        android:title="메뉴 아이템 1" />
    <item
        android:id="@+id/menu_item2"
        android:title="메뉴 아이템 2" />
    <item
        android:id="@+id/menu_item3"
        android:title="메뉴 아이템 3" />
</menu>
- 사이드 메뉴바의 메뉴들을 만들어 줍니다.
- res > menu (디렉터리 생성) > drawerlayout.xml (파일 생성)
3. 사이드 메뉴바 기능 구현


- 아래는 불러온 소스코드입니다.
/***
*  -> 사이드 네브바 세팅
*   - 클릭 아이콘 설정
*   - 아이템 클릭 이벤트 설정
*/
public void settingSideNavBar()
{
  // 툴바 생성
  Toolbar toolbar = findViewById(R.id.toolbar);
  setSupportActionBar(toolbar);

  // 사이드 메뉴를 오픈하기위한 아이콘 추가
  getSupportActionBar().setDisplayHomeAsUpEnabled(true);
  getSupportActionBar().setHomeAsUpIndicator(R.drawable.ic_baseline_dehaze_48);

  // 사이드 네브바 구현
  DrawerLayout drawLayout = (DrawerLayout) findViewById(R.id.drawer_layout);
  NavigationView navigationView = (NavigationView) findViewById(R.id.nav_view);

  ActionBarDrawerToggle actionBarDrawerToggle = new ActionBarDrawerToggle(
      MainActivity.this,
      drawLayout,
      toolbar,
      R.string.open,
      R.string.closed
  );

  // 사이드 네브바 클릭 리스너
  drawLayout.addDrawerListener(actionBarDrawerToggle);

  // -> 사이드 네브바 아이템 클릭 이벤트 설정
  navigationView.setNavigationItemSelectedListener(new NavigationView.OnNavigationItemSelectedListener() {

  @Override
  public boolean onNavigationItemSelected(@NonNull MenuItem menuItem) {

      int id = menuItem.getItemId();

      if (id == R.id.menu_item1){
         Toast.makeText(getApplicationContext(), "메뉴아이템 1 선택", Toast.LENGTH_SHORT).show();
      }else if(id == R.id.menu_item2){
     	 Toast.makeText(getApplicationContext(), "메뉴아이템 2 선택", Toast.LENGTH_SHORT).show();
      }else if(id == R.id.menu_item3){
     	 Toast.makeText(getApplicationContext(), "메뉴아이템 3 선택", Toast.LENGTH_SHORT).show();
      }


        DrawerLayout drawer = findViewById(R.id.drawer_layout);
        drawer.closeDrawer(GravityCompat.START);
        return true;
      }
  });

}


/***
*  -> 뒤로가기시, 사이드 네브바 닫는 기능
*/
@Override
public void onBackPressed() {
  DrawerLayout drawer = findViewById(R.id.drawer_layout);
  if (drawer.isDrawerOpen(GravityCompat.START)) {
  	drawer.closeDrawer(GravityCompat.START);
  } else {
  	super.onBackPressed();
  }
}
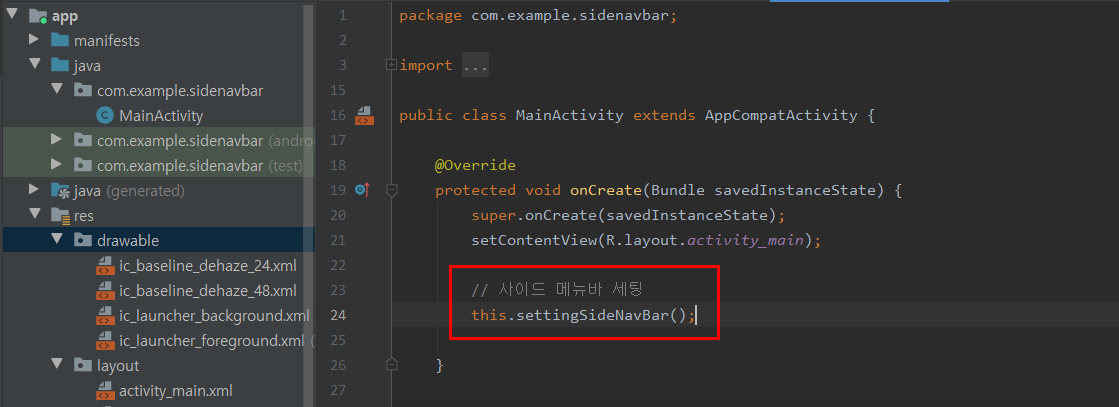
- 스틱코드를 이용해서 사이브 메뉴바를 세팅하는 코드를 불러와 주세요.
- 불러온 기능을 세팅해 줍니다.


- 사이드 메뉴바에 사용할 아이콘을 생성해 줍니다.

- 생성한 아이콘을 사이드 메뉴바에 세팅해줍니다.
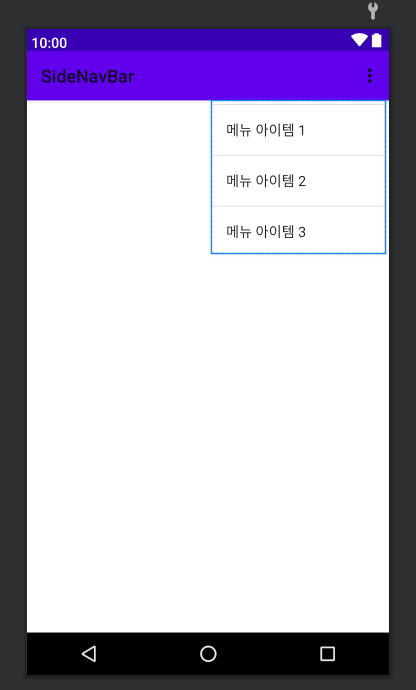
4. 테스트

정상적으로 잘 동작하는 것을 확인하실 수 있습니다 : )
'안드로이드 자바' 카테고리의 다른 글
| [JAVA][안드로이드] 앨범에서 다중 이미지 불러오기 (4) | 2021.04.01 |
|---|---|
| [JAVA][안드로이드] 네이버 검색 API를 빠르게 구현 하기 (4) | 2021.03.31 |
| [JAVA][안드로이드] 그림판 앱 구현하기 (0) | 2021.03.29 |
| [JAVA][안드로이드] 브로드캐스트 리시버를 사용해 이어폰 연결 상태 체크하기 (0) | 2021.03.28 |
| [Java][Andoird] Picasso 라이브러리를 활용하여 이미지 URL을 ImageView에 쉽게 띄우기 (0) | 2021.03.27 |


