728x90
안녕하세요. 이번시간에는 Bottom Sheet 프래그먼트의 크기를 커스텀해보는 시간을 가져보도록 하겠습니다.
진행 방향은 다음과 같습니다.
1. Bottom Sheet이 무엇인가?
- Bottom Sheet의 크기를 조절할려면?
2. Bottom Sheet 만들기
2-1) MainActivity 만들기
2-2) Fragment 만들기
1. Bottom Sheet이란 무엇인가?

우선 우리가 만들고자 하는 Bottom Sheet가 무엇인지 짚고 넘어가야겠죠?
Bottom sheets are surfaces containing supplementary content that are anchored to the bottom of the screen.
Material Design에서 정의한 Bottom Sheet 내용입니다.
해석해보면 하단에 고정되어 있고 컨텐츠를 포함하고 있는 표면이라고 합니다. 표면이라고 말한 이유는 Material Design이 현실 세계 디자인을 반영한 UX 디자인이기 때문입니다.
2. Bottom Sheet 만들기
Bottom Sheet를 사용하기 위해서는 아래 의존성이 Gradle App Level에 추가 되어야합니다.
implementation 'com.google.android.material:material:<version>'2-1) MainActivity 만들기
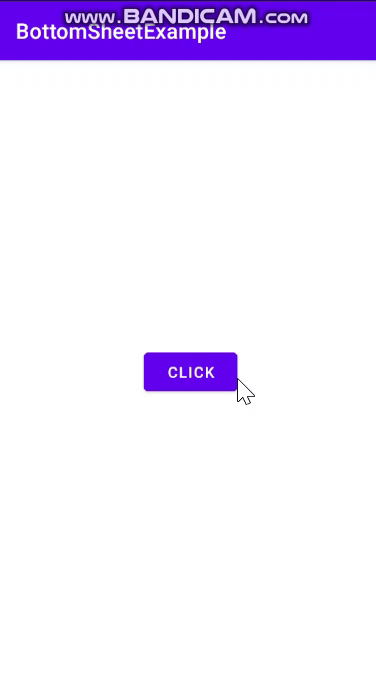
우선 MainActivity의 XML 파일은 다음과 같이 작성해주시면 됩니다.
<?xml version="1.0" encoding="utf-8"?>
<androidx.constraintlayout.widget.ConstraintLayout xmlns:android="http://schemas.android.com/apk/res/android"
    xmlns:app="http://schemas.android.com/apk/res-auto"
    xmlns:tools="http://schemas.android.com/tools"
    android:layout_width="match_parent"
    android:layout_height="match_parent"
    tools:context=".MainActivity">

    <Button
        android:id="@+id/button"
        android:layout_width="wrap_content"
        android:layout_height="wrap_content"
        android:text="Click"
        app:layout_constraintBottom_toBottomOf="parent"
        app:layout_constraintLeft_toLeftOf="parent"
        app:layout_constraintRight_toRightOf="parent"
        app:layout_constraintTop_toTopOf="parent" />

</androidx.constraintlayout.widget.ConstraintLayout>
class MainActivity : AppCompatActivity() {
override fun onCreate(savedInstanceState: Bundle?) {
super.onCreate(savedInstanceState)
setContentView(R.layout.activity_main)
val button = findViewById<Button>(R.id.button)
button.setOnClickListener {
val bottomSheet = BottomSheetFragment()
bottomSheet.show(supportFragmentManager, BottomSheetFragment.TAG)
}
}
}Fragment 만들기
<?xml version="1.0" encoding="utf-8"?>
<LinearLayout xmlns:android="http://schemas.android.com/apk/res/android"
    xmlns:app="http://schemas.android.com/apk/res-auto"
    xmlns:tools="http://schemas.android.com/tools"
    android:layout_width="match_parent"
    android:layout_height="match_parent"
    android:orientation="vertical"
    tools:context=".BottomSheetFragment">

    <ImageView
        android:id="@+id/imageView"
        android:layout_width="match_parent"
        android:layout_height="match_parent"
        android:src="@drawable/ic_launcher_foreground"/>

</LinearLayout>
class BottomSheetFragment : BottomSheetDialogFragment() {
override fun onCreateView(
inflater: LayoutInflater, container: ViewGroup?,
savedInstanceState: Bundle?
): View? {
// Inflate the layout for this fragment
return inflater.inflate(R.layout.fragment_bottom_sheet, container, false)
}
companion object {
const val TAG = "BottomSheetFragment"
}
}이렇게만 코드를 짜고 실행하게 되면 아래와 같이 최소영역으로 컨텐츠가 담기게 됩니다.

만약 BottomSheet의 크기를 조절하고 싶다면 어떻게 해야 할까요? 가령 화면의 2/3 크기만큼 띄워주고 싶다던가..
이런 경우에는 BottomSheetDialog를 아래와 같이 수정해주면 됩니다.
override fun onCreateView(
        inflater: LayoutInflater, container: ViewGroup?,
        savedInstanceState: Bundle?
    ): View? {
        // Inflate the layout for this fragment
        return inflater.inflate(R.layout.fragment_bottom_sheet, container, false)
    }

    companion object {
        const val TAG = "BottomSheetFragment"
    }
    /** onCreateDialog
     *  목적 : 나만의 커스텀 다이얼로그를 만들기 위함.
     *  How? : dialog.setOnShowListener{}의 인자값인 'DialogInterface'를 크기 조절하고 이벤트를 달 수 있음(닫힘, 취소 등)
     * */
    override fun onCreateDialog(savedInstanceState: Bundle?): Dialog {
        val dialog: Dialog = super.onCreateDialog(savedInstanceState)
        Logger.w("다이얼로그 생성 실행")
        dialog.setOnShowListener {
            val bottomSheetDialog = it as BottomSheetDialog
            // 다이얼로그 크기 설정 (인자값 : DialogInterface)
            setupRatio(bottomSheetDialog)
        }
        return dialog
    }

    /** setupRatio()
     * bottomSheet
     *      - 전달받은 DialogInterface를 통해 View를 참조하도록 한다.
     *      - 이때 id 값에는 내가 만든 View가 들어가는게 아님을 주의하자.
     * layoutParams
     *      - View를 감싸고 있는 Parents에게 어떻게 레이아웃 할 것인지 설정하는데 사용함.
     * behavior
     *      - 생성한 View를 통해 BottomSheetBehavior를 생성한다.
     *      - 역할 : BottomSheetBehavior로 상태값을 '확장형'으로 설정해준다.
     * */
    private fun setupRatio(bottomSheetDialog: BottomSheetDialog) {
    	Logger.w("setupRatio 실행")
        //id = com.google.android.material.R.id.design_bottom_sheet for Material Components
        //id = android.support.design.R.id.design_bottom_sheet for support librares
        val bottomSheet = bottomSheetDialog.findViewById<View>(com.google.android.material.R.id.design_bottom_sheet) as View
        val behavior = BottomSheetBehavior.from<View>(bottomSheet)
        val layoutParams = bottomSheet!!.layoutParams
        layoutParams.height = getBottomSheetDialogDefaultHeight()
        bottomSheet.layoutParams = layoutParams
        behavior.state = BottomSheetBehavior.STATE_EXPANDED
    }

    private fun getBottomSheetDialogDefaultHeight(): Int {
        return getWindowHeight() * 85 / 100
    }

    private fun getWindowHeight(): Int {
        // Calculate window height for fullscreen use
        val displayMetrics = DisplayMetrics()
        (context as Activity?)!!.windowManager.defaultDisplay.getMetrics(displayMetrics)
        return displayMetrics.heightPixels
    }
코드 중간에 나오는 Logger 라이브러리는 스틱코드를 참고하시면 가져다 쓸 수 있습니다.
'안드로이드 코틀린' 카테고리의 다른 글
| [Kotlin][Android] 이미지 url로 이미지 로딩하기 (0) | 2022.01.10 |
|---|---|
| [Kotlin][Android] 비밀번호 hash 암호화하기 (0) | 2022.01.05 |
| [Kotlin][Android] 기본으로 표시되는 툴바 커스텀하기 (0) | 2021.12.18 |
| [Kotlin][Android] TextInputLayout 사용하여 로그인 화면 만들기 (0) | 2021.12.15 |
| [Kotlin][Android] 입력값의 태그 추출하기 (0) | 2021.12.14 |


